
In this first update, I introduce to you Tynny in her current state, now on to the first stages of getting her ready for the, 'big move'.
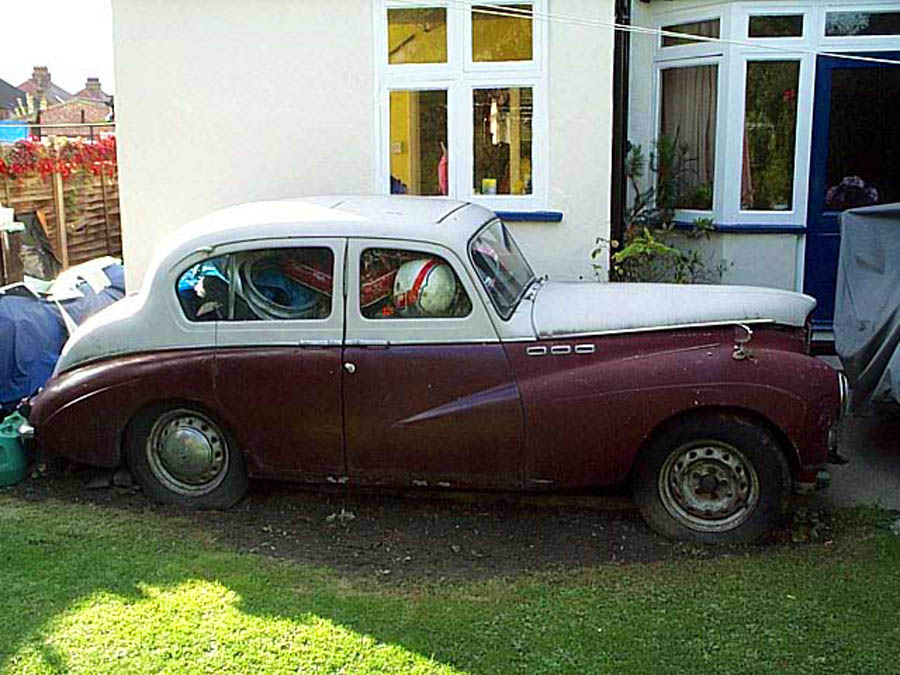
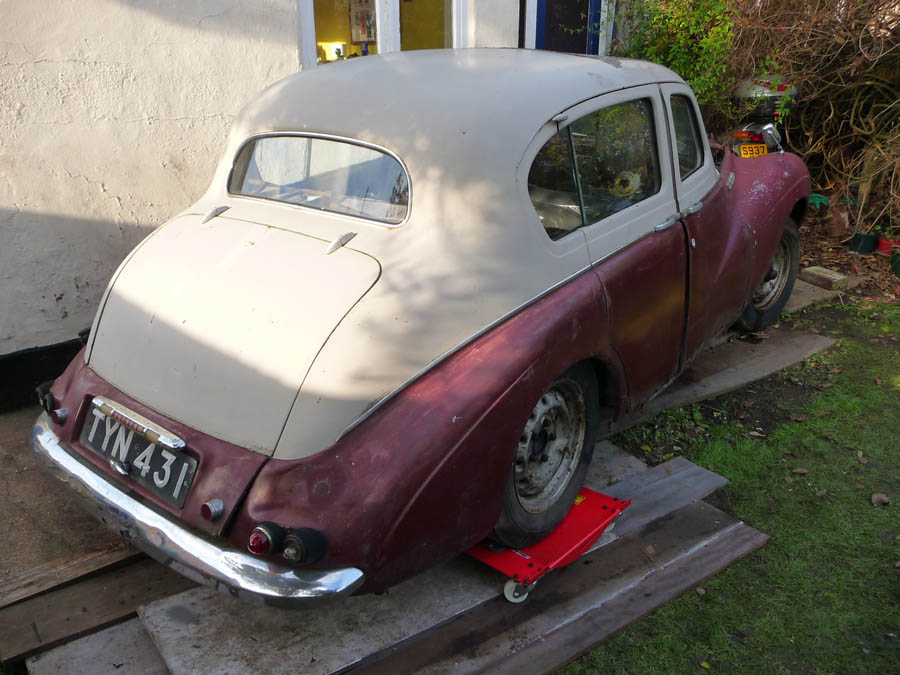
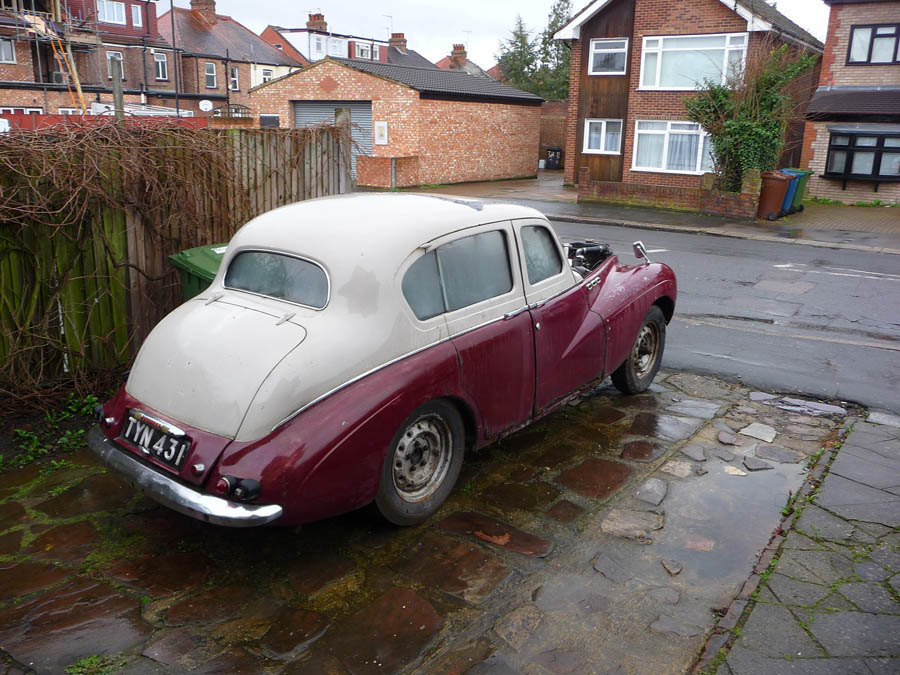
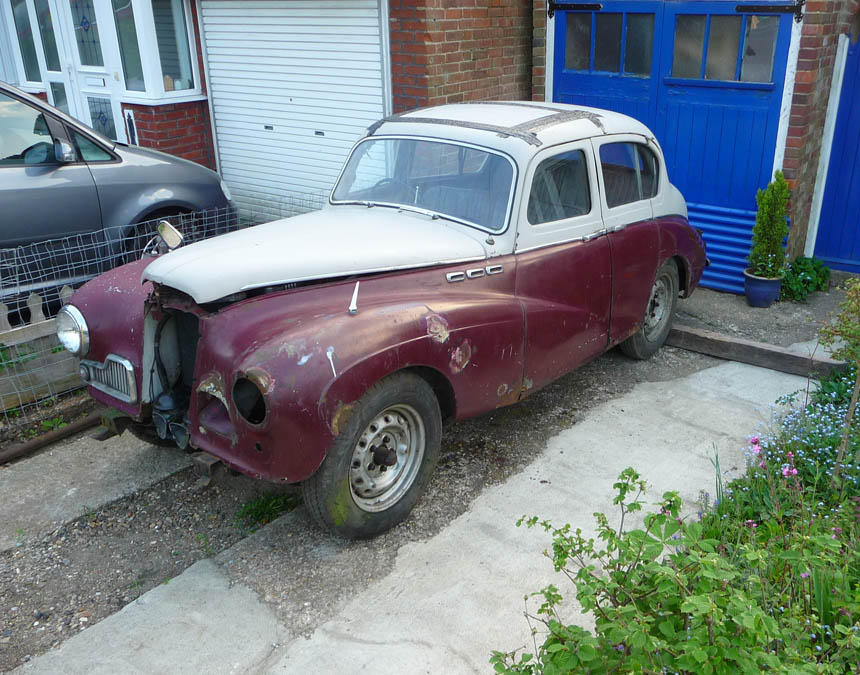
Here she is in the garden filled with 17 years of accumulated 'stuff'.
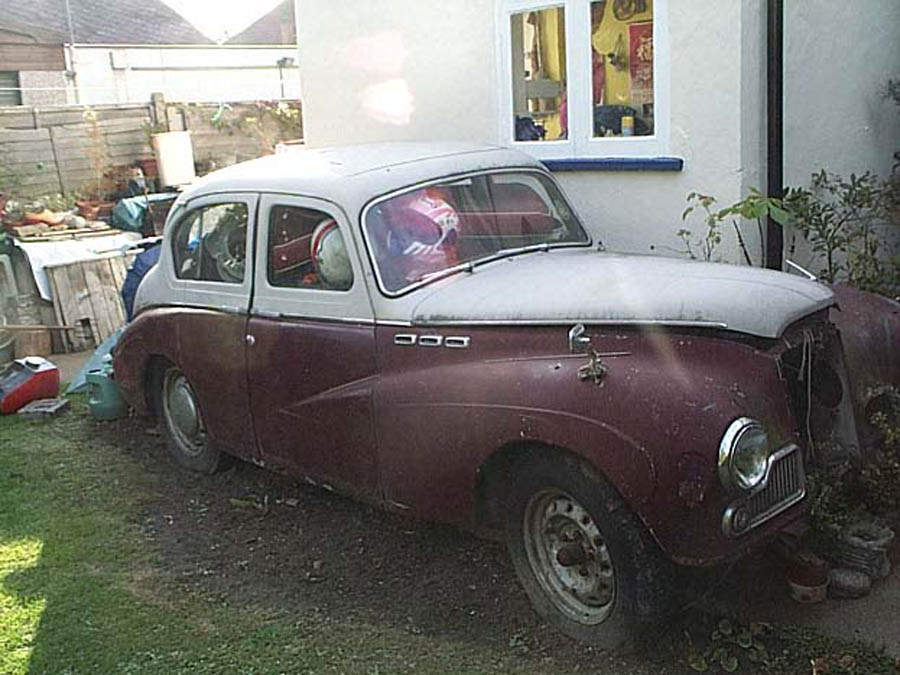
As you can see she was parked hard up against the kitchen wall. Good at the time of moving her so she was neatly parked, but now it comes to move her, this would become quite a problem.
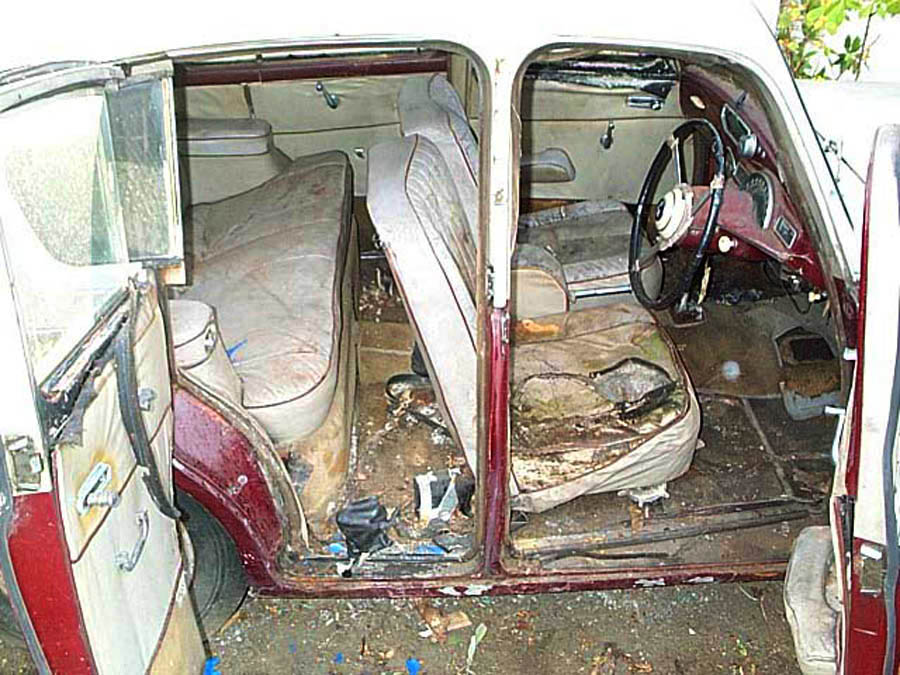
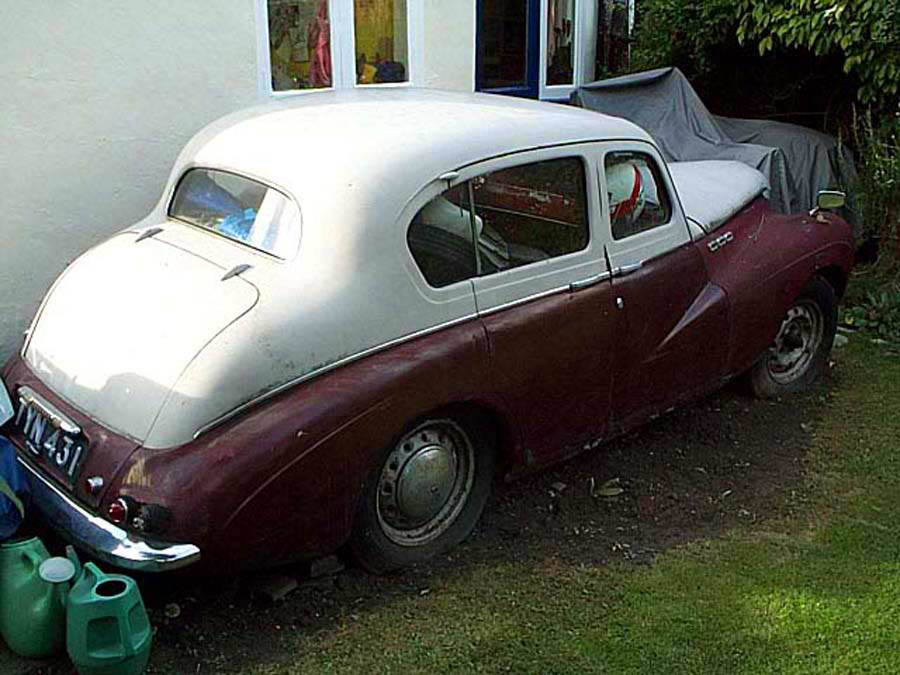
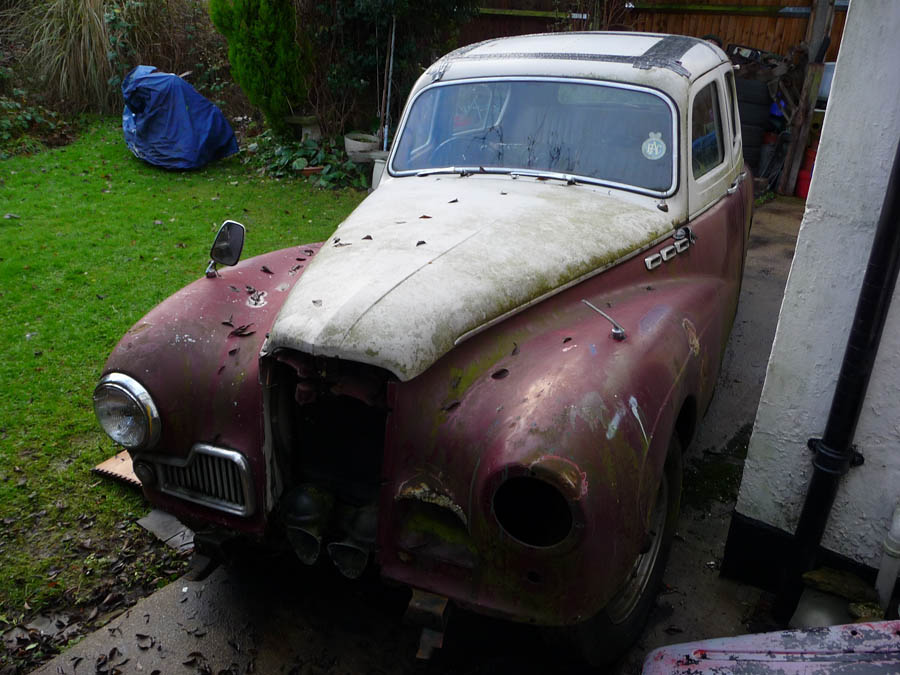
Unfortunately being outside has taken its toll on the interior, a leaking sunroof didn't help.

Another view of the interior.
 |
As mentioned on the 'about Tynny' page we decided we had to give her a 'fair chance’. This meant a series of stages to see if she would become a going concern. The first of which was to get her engine running. Remarkably turning the engine over by hand on the starting handle revealed the engine was not seized, nor was the transmission. We did however find no spark and no fuel, so a new coil, HT lead and spark plugs were bought along with some fresh petrol and she soon burst into life. See Tynny's You Tube channel for more.
We even got her moving backward and forwards a little but the next problem was that she was hard up against the kitchen wall. We did have about six inches to spare but whilst we could inflate three of the tyres the nearside rear was having none of it. Despite great care and a fair amount of Physics, the flat tyre made Tynny slide closer and closer to the wall!
The answer... Dollies! A quick bit of internet ordering later and we had a pair of dollies which were perfect. The jacking up of the car was a little tricky as no matter what we did, we just couldn't get her high enough. You see we only had one of those £20 baby trolley jacks available, but with a little ingenuity (and quite a few bricks) we got the dollies under the tyres and with minimal effort she slid majestically side ways giving as much room as we needed.

As you can see here the dollies did the job, so when it comes to moving her proper it will (hopefully) be greeted with success.
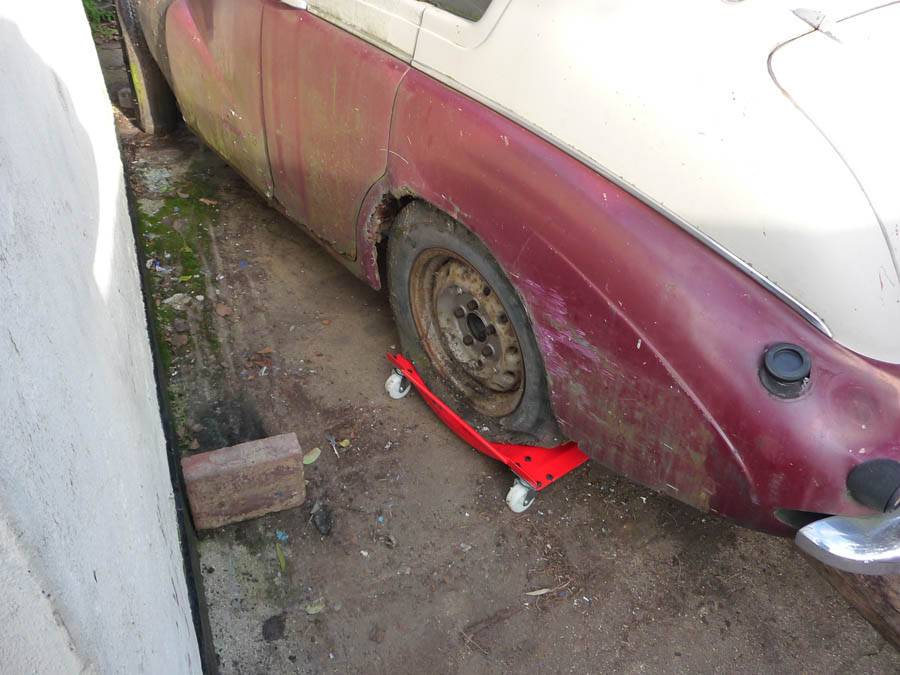
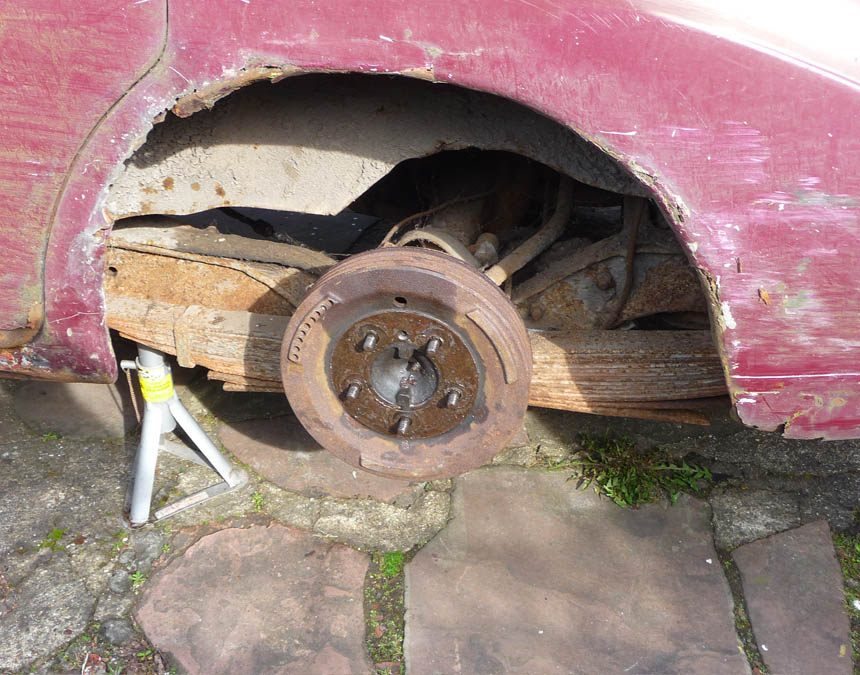
The offending nearside rear which not only had a bad tyre, but unlike the other three wheels, was seized solid, Grrrr!
And this concludes this update. In her new place with all four wheels on the ground again ready for the next weekend of Sunbeam goodness. Oh and as luck would have it a quick check of the spare wheel well revealed umm, a spare wheel! The tyre held pressure and was in fair condition, so all four tyres will easily be able to take on the 'big move'.
Back to the top»
This update consists of working out what to do with a non-existent throttle pedal and seeing if we can get the cooling system working.
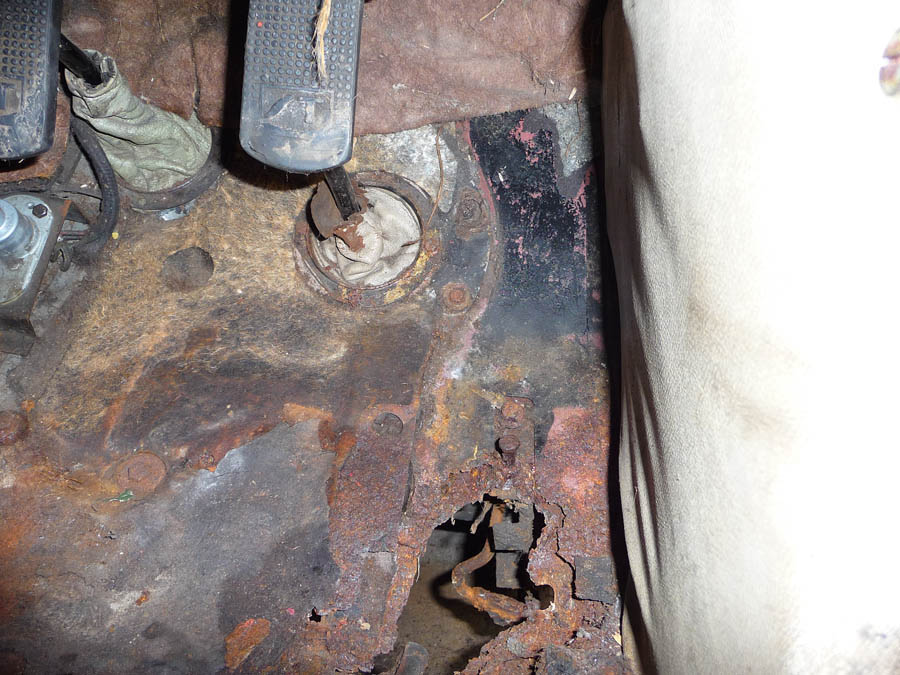
With the engine now running we were filled with encouragement, however when I was inside the car getter her started I noticed that the throttle pedal was flat on the floor. I didn't think much of it at the time as I assumed the cable had become stuck. One closer inspection I found not only had the pedal become totally detached but on lifting the remnants of the carpet I was greeted by a medium sized rusty hole where the throttle had once been.
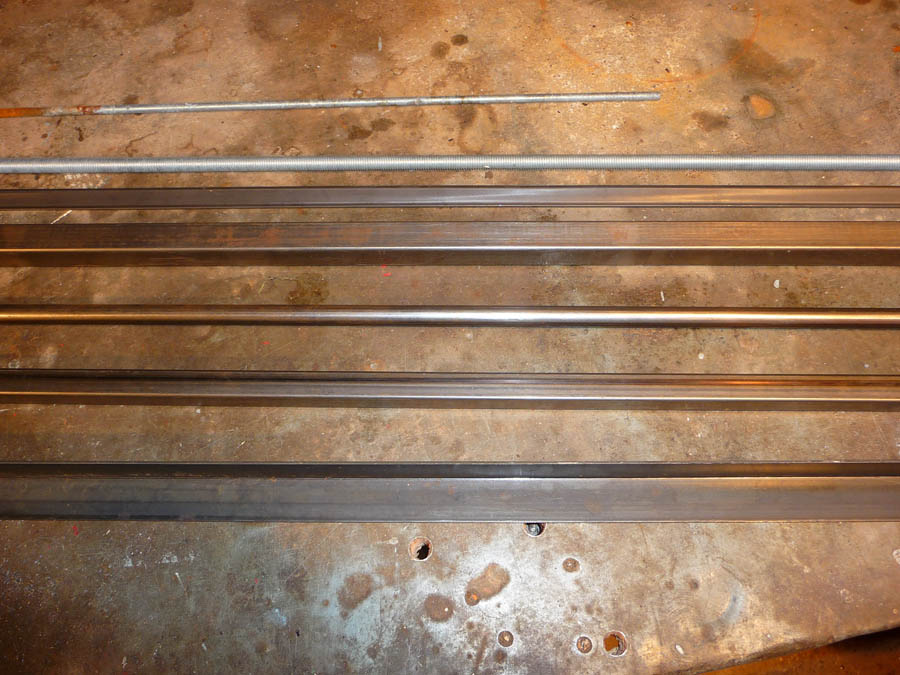
A bit of head scratching later and the realisation that to move the car I needed to control the engine speed properly and safely I decided a temporary solution had to be fabricated. I measured as many dimensions and angles I could and with loads of reference photos I set to work making up some paper templates to get the right angle of dangle. With various pieces of mild steel (see above) I set to work fabricating proper.
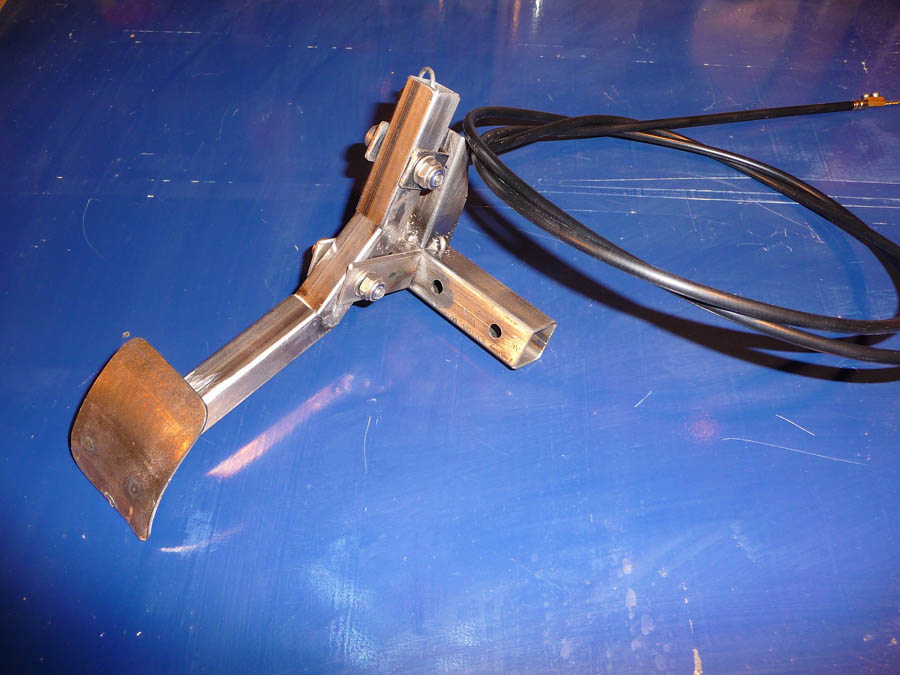
This was the result, made from scratch and with cable adjustment. Not bad for an afternoons work.
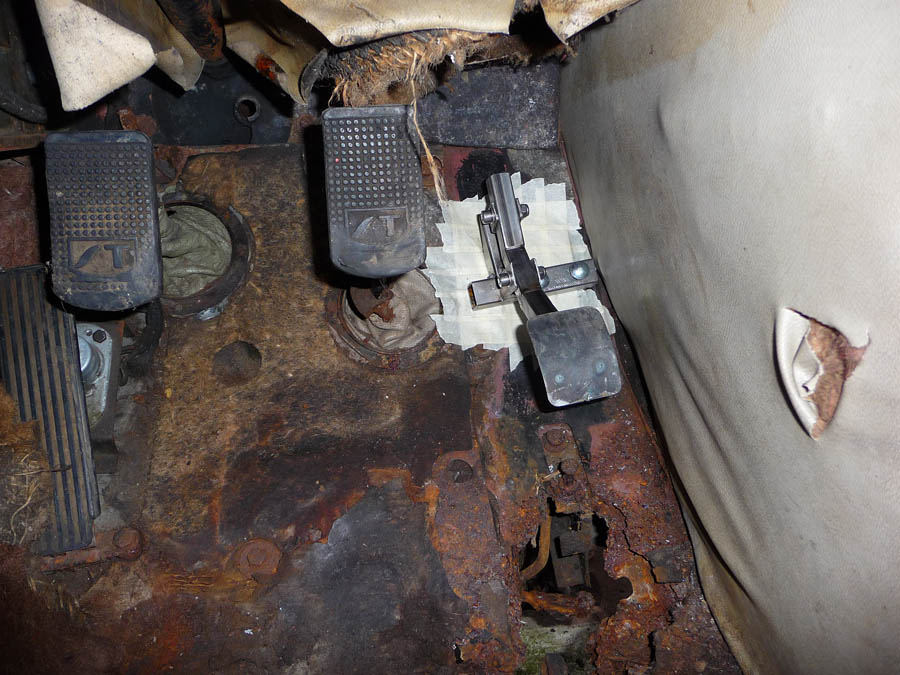
Not knowing whether the measurements or angles I took were going to be OK, as it's hard to get down a foot well of a Sunbeam when you are 6'4" and built like a "you know what" I offered up the new pedal assembly, drilled the holes and bolted it in. To my great surprise it fitted perfectly and once connected up we now had a fully working throttle again. I am still chuffed how well it works, having envisaged having to take it out again and cut it about because it fouled something.
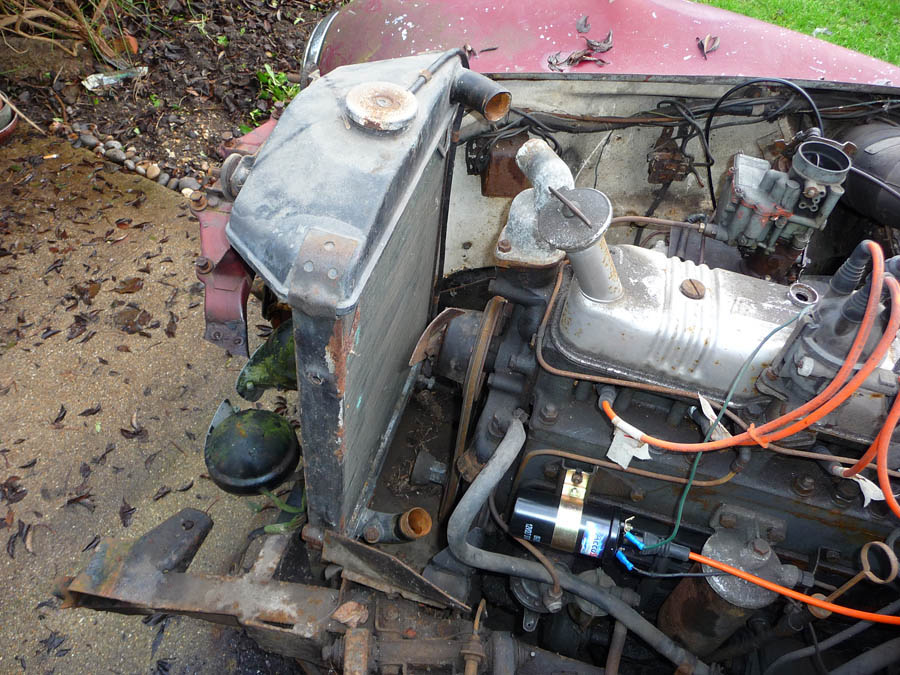
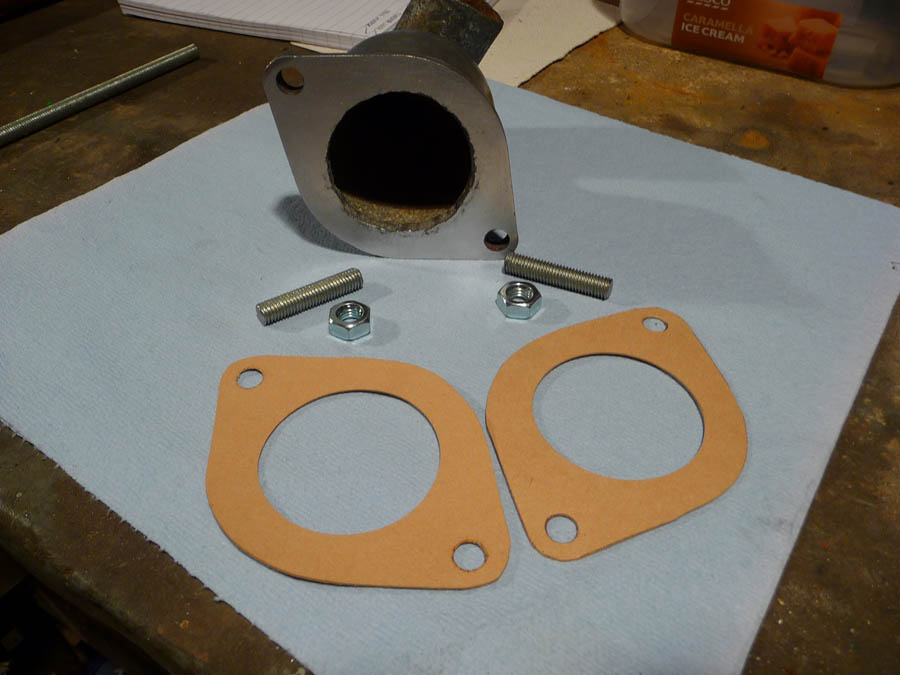
Onto the cooling system now, and because the engine will be running a fair time to get her moved right out this was vital. Not knowing whether it would even hold water let alone under pressure we decide to get it connected up just fill with water to test.

The first minor problem that the mounting nuts had been lost for the radiator, thankfully my Father had a parts catalogue in our store of Sunbeam reference material so the week before I had ordered the appropriate nuts and washers from Namrick for the task.
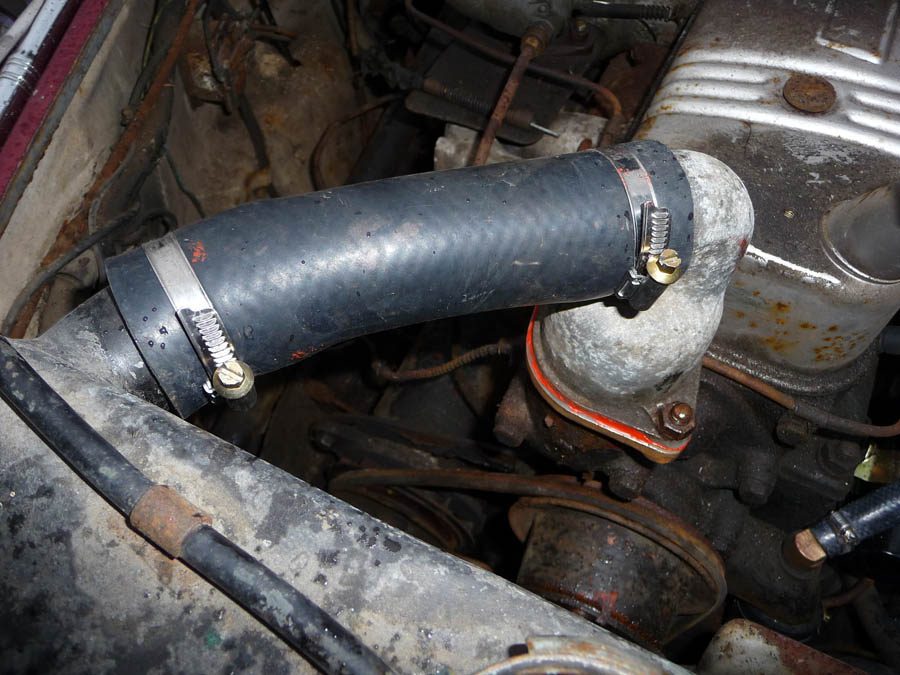
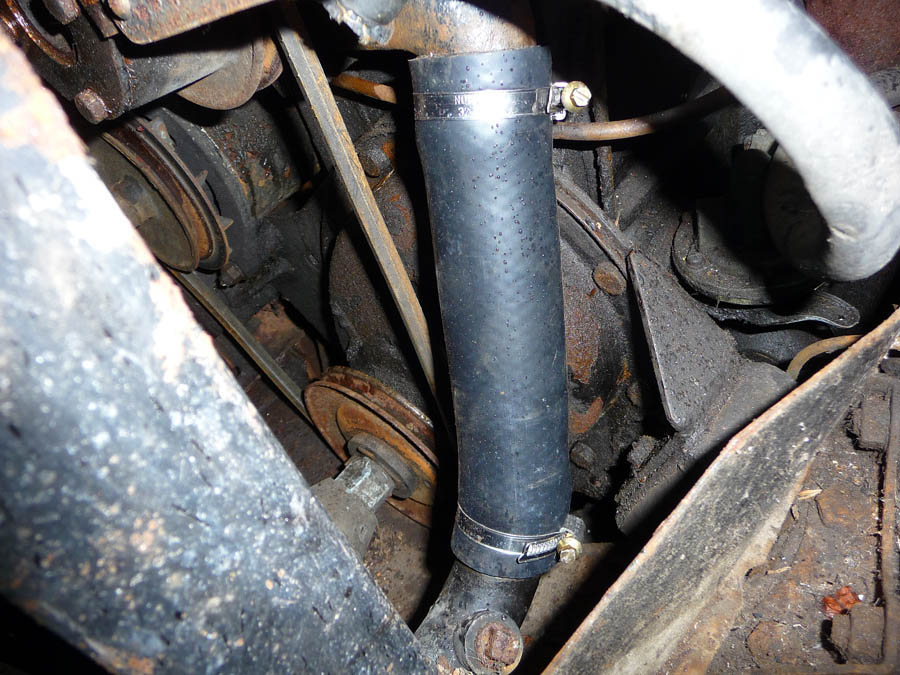
I had also taken off the old hoses to take measurements and found a cut meter length off of Ebay along with a length of heater hose and hose clips.
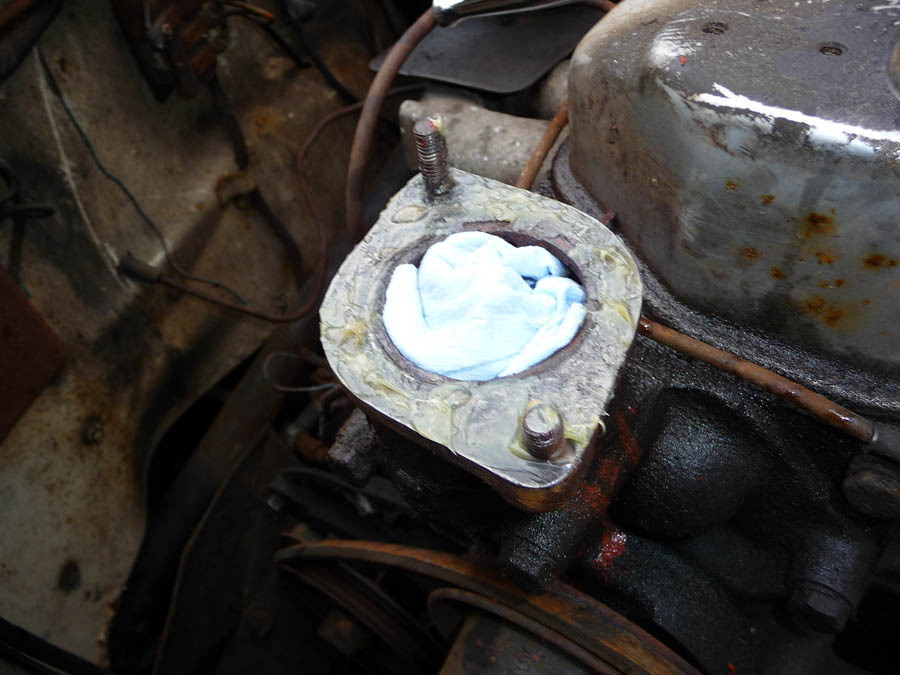
Bottom hose fitted, and the small leak from the thermostat hosing fixed with some instant gumbo.
I decided to bypass the whole heating system as we didn't need this to get the cooling system working and so didn't warrant the possible leaks that might happen. So a length of heater hose was connected straight from the water pump housing to the top of the cylinder head.

With everything connected we fired her up and up to temperature and what do you know, no leaks any where and inspection of the filler hole revealed the pump was working with a good swirl of water visible. The system was drained ready for some fresh antifreeze. Once filled she was fired up again but alas the thermostat housing started to leak again, a job for next weekend...
Back to the top»
With the leak to fix from last time, things get a little worse before they get better for the cooling system.
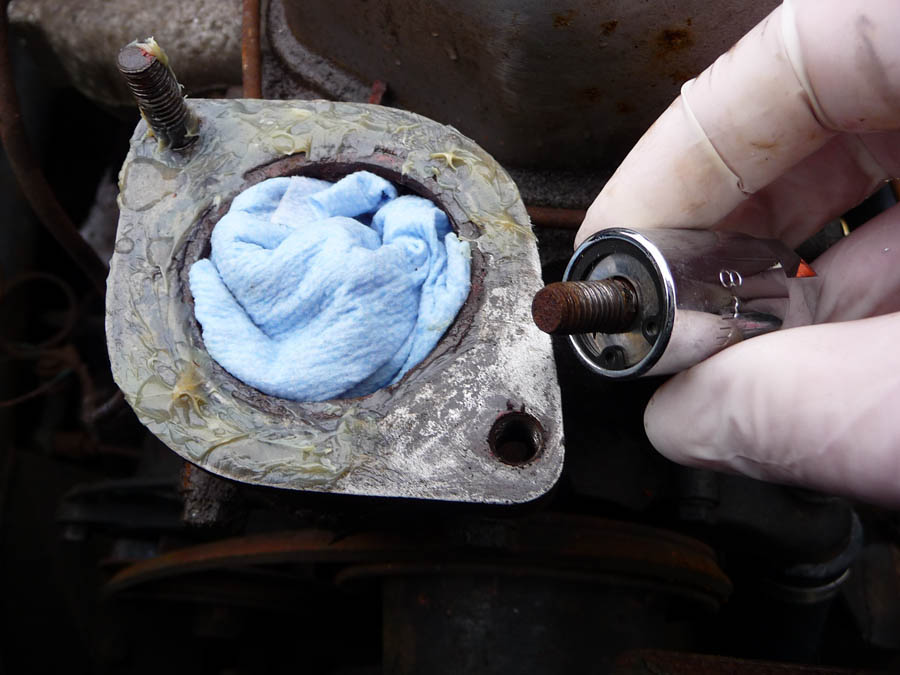
First job to do was to remove the thermostat housing to fix the leak from last time and this is where stupidity ruled supreme. You see not having got hold of some proper BSW/BSF spanners or sockets yet I decided to employ the nearest metric socket I had which had worked fine last time but today would see the 5/16" nut grip tightly. With even gently wiggling to free it of resulted in a stud shearing off. Yes I know, what a *****.
After much self flagellation later I decided to give it best smear a load of grease on the virgin metal and stuff some blue roll down the hole to prevent lumps of crud falling into the water jacket. Well at least that was sensible.
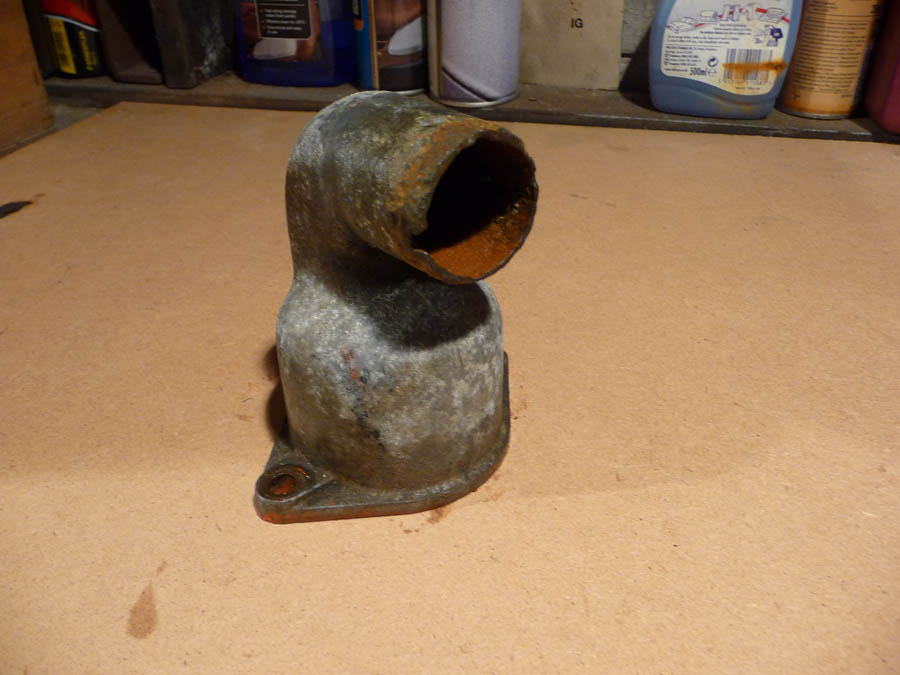
I took the crusty thermostat housing home and in the week between I got on with cleaning it up ready for a more productive affair on the next weekend.
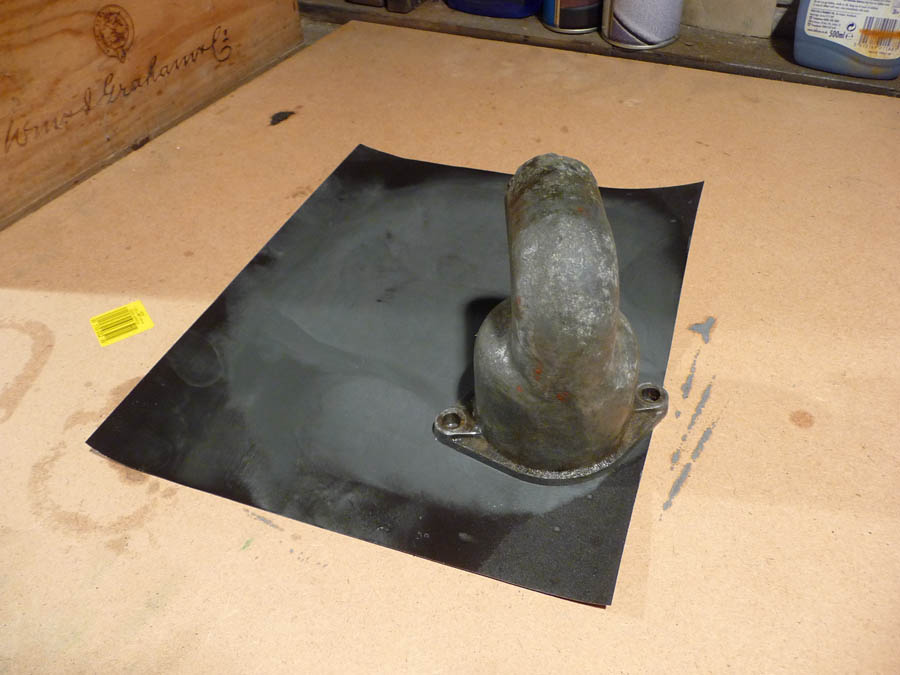
Much figure of eight motions got rid of all the pitting getting it back to a nice level face.
I also gave the casting a bit of a scrub to make it shine a little more.
Making sure there was no chance of even more ham fisted shenanigans and more importantly leaks! I ordered a set of BSW/BSF spanners and sockets (both 1/2" and 3/8" drive) along with a Frost gasket paper set, some studding, nuts, washers and a tap set, all from Namrick once again. A cardboard template was made first for the gaskets then two proper gaskets were cut out from the paper ordered (two just in case)
The next weekend I set to work and although I had ordered a tap set, just in case, thankfully there was still enough stud left proud for my Snap-On extractors to grasp at. The studs came out with ease, I decided to take them both out as A, the other could also be fatigued (by me) and B, it would give me a good chance of cleaning up the face better.
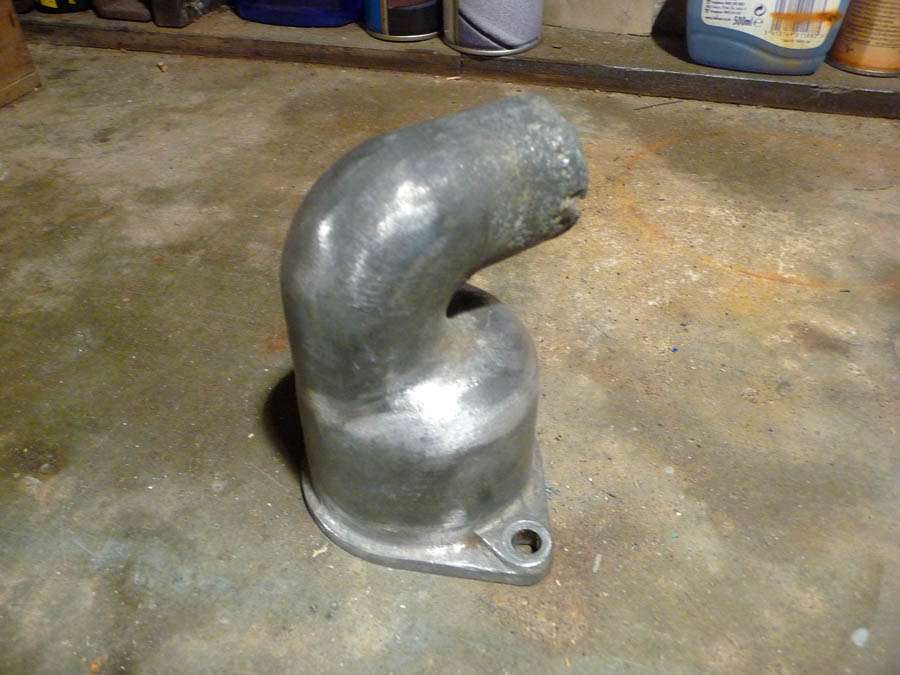
With face cleaned up I screwed in the new studs with a blob of locking compound on each, and then gave that a chance to set.

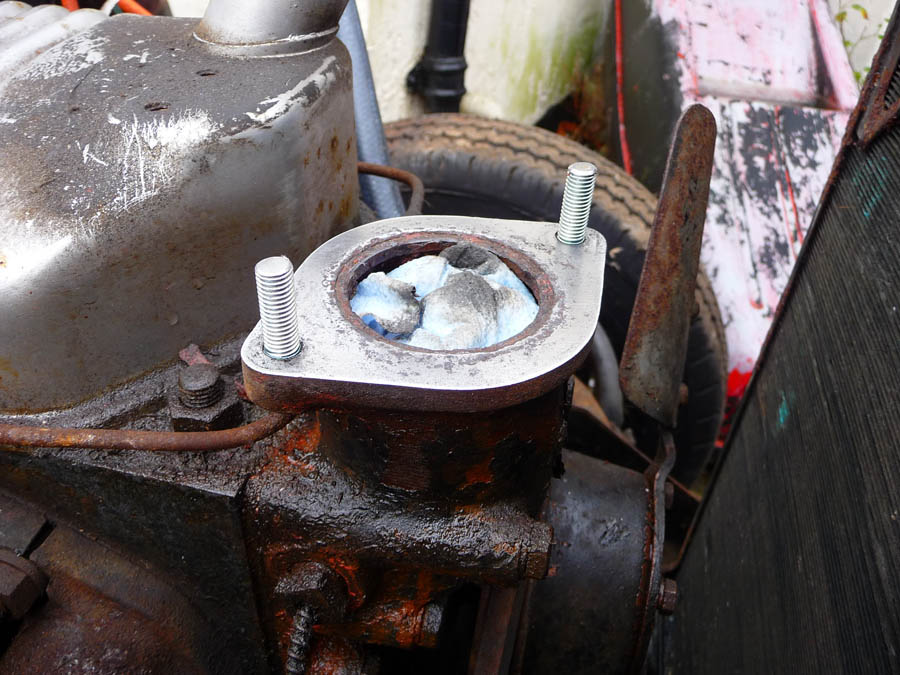
The new gasket was fitted with a good smear of gasket goo and the thermostat housing was screwed into place. Hoses back on and coolant topped up, and it was time to start her up and see if we had got rid of the leak. I am pleased to report that her coolant system is leak free even up to temperature and pressure.
|
Here we have the final result of the work on the cooling system on film. See Tynny's You Tube channel for more.
The last job this time was to have a look in the brake fluid reservoir which revealed that although there was little left, it was still wet! At least this is slightly encouraging when I have to get some sort of braking system for the big move.
Back to the top»
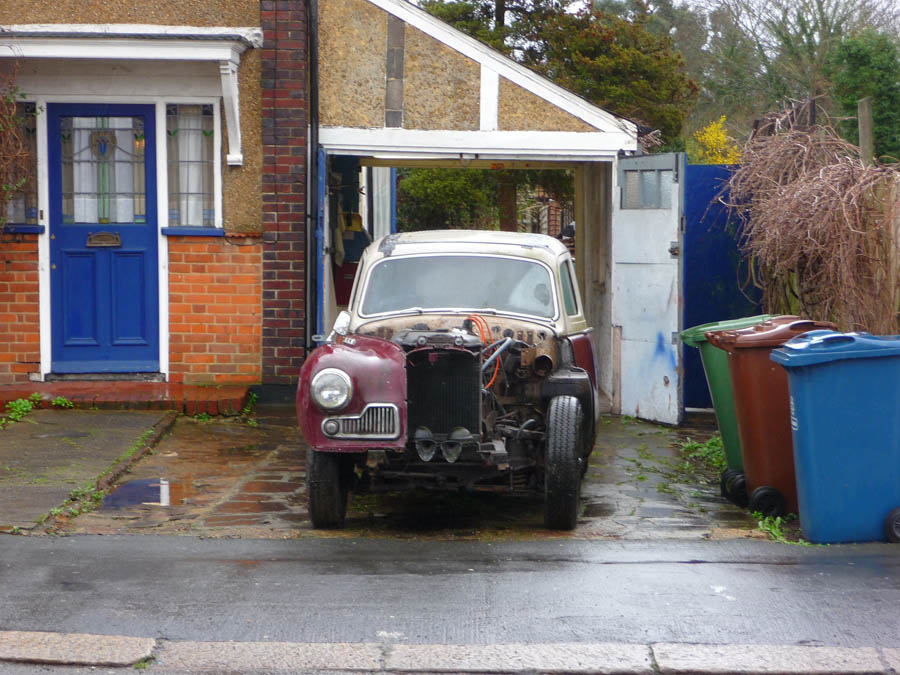
Much preparation this week, we are finally going to try and get Tynny out of the grips of the garden and into the safety of a dry garage.
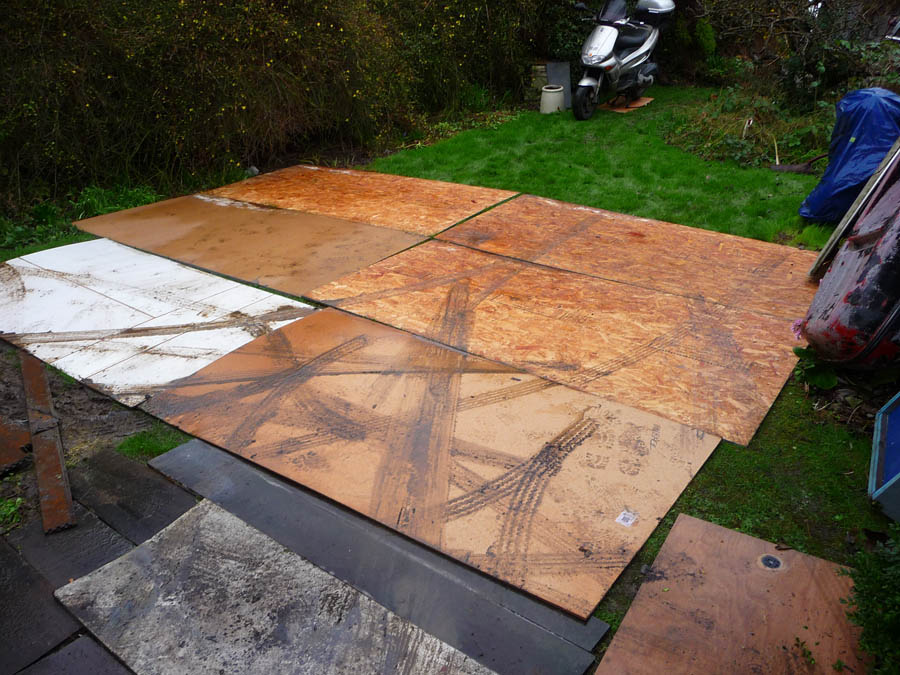
Whilst we were getting the various "give here a fair chance" jobs done we were also clearing the garage ready for 'the big move'. Even though it was raining, this was the weekend we'd been waiting for to see if our efforts were in vain. Luckily the garage clear out had provided various 8'x 4' sheets with which we used to protect the lawn from the bog it would soon turn into.
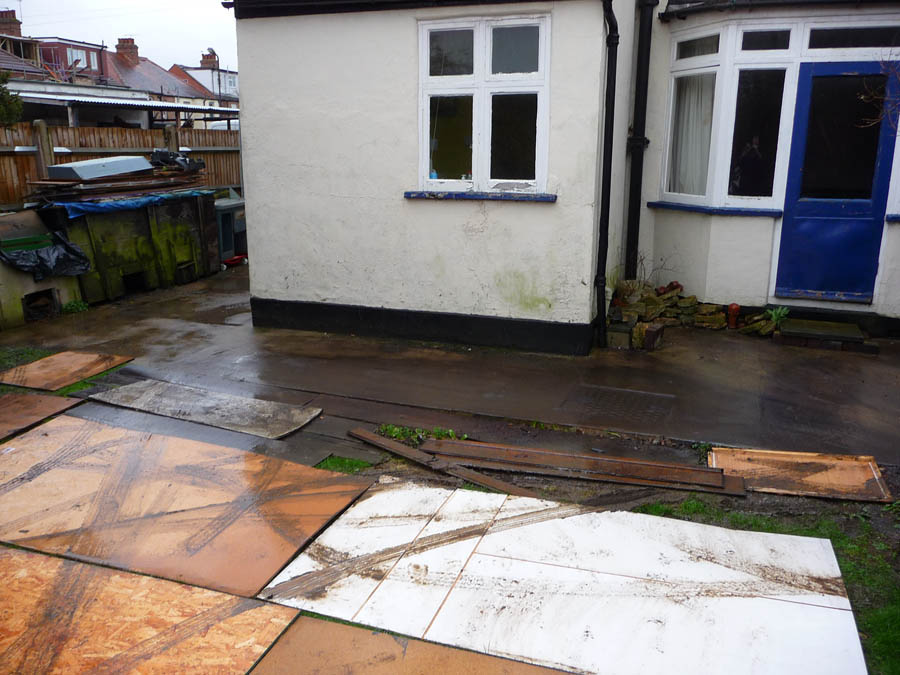
It was time to see if we can get her shifted, well the photo speaks it's self here. Turning her around wasn't that hard but getting her through the gap between the kitchen wall and the old coal bunker to the left of the photo was a little tricky. We managed to get her through with less that an inch to spare along the off side.
|
What a result and a great feeling as I drove Tynny through the garage and on to the drive. I must thank my 'Death Defiying' mum for not only filming this, but potentially being run over by a 'Tynny" with no brakes... See Tynny's You Tube channel for more.
Looking back at the tightness we had to deal with, nice and relieved now we are the right side of it.
Here she is sitting on the drive ready to go back into the garage. The rain gives a nice sheen to the paint work, a shame it's not quite like that.
Another view from across the road, my dad took the wing off many moons ago which is really helpful with current tinkering.
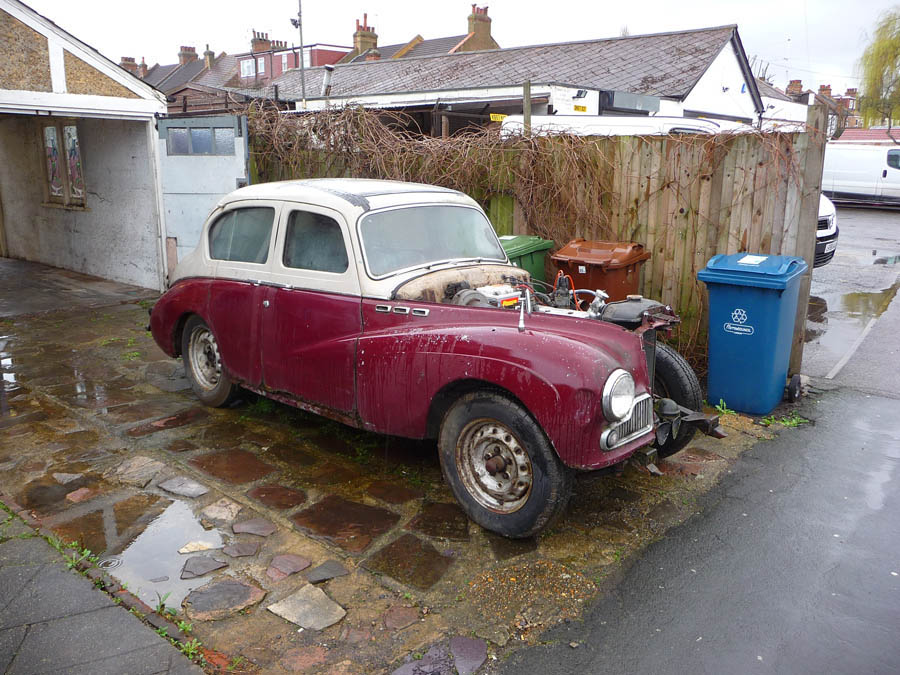
Another view on the drive.
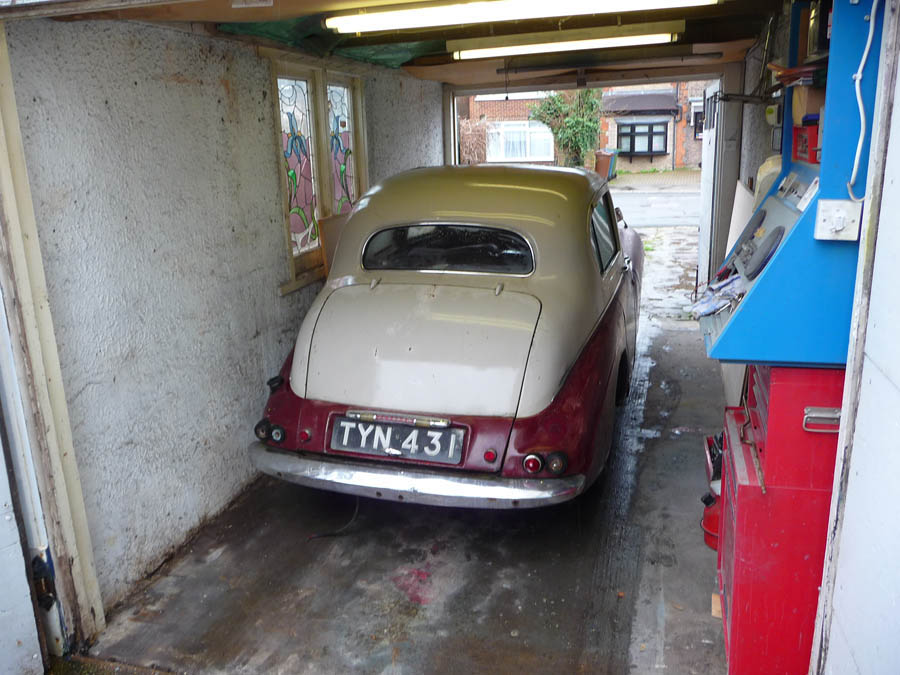
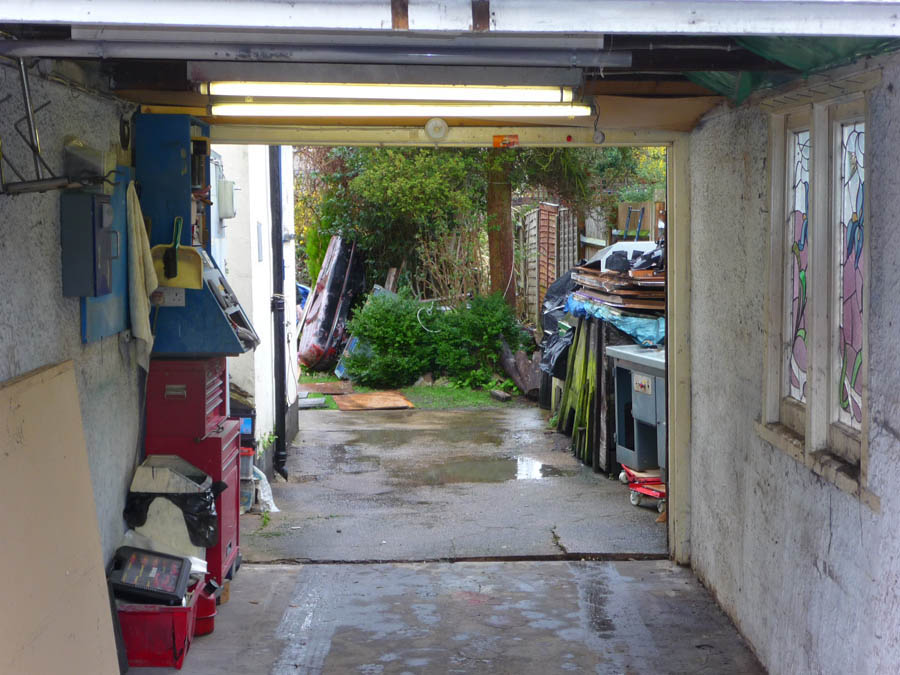
Now back in the garage where she belongs where she can dry out a bit.

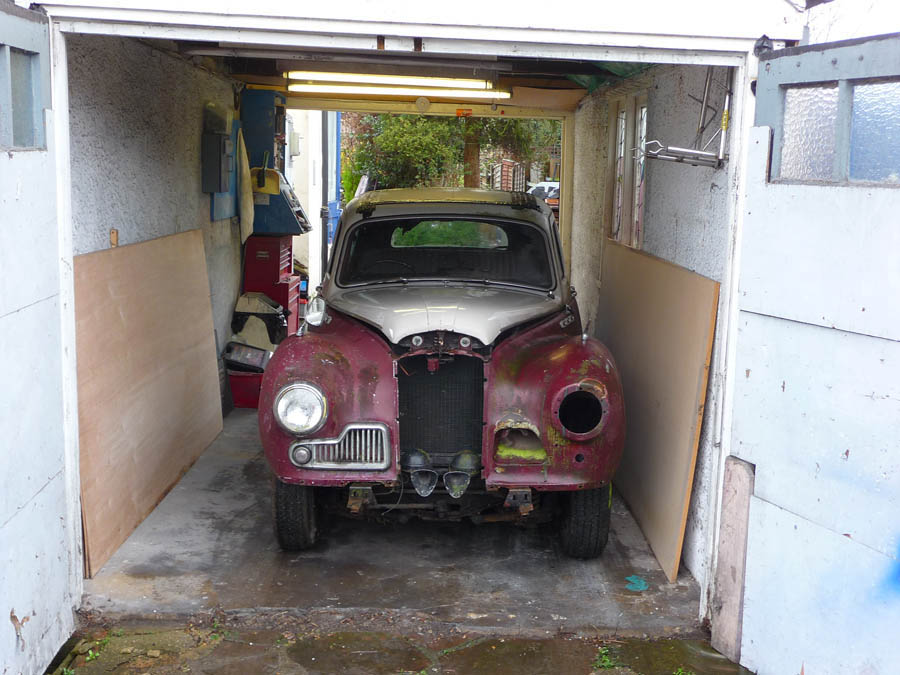
Now with her 'quick release' wing and bonnet put back into place so at least she has a prettier face.
Final view before we lock her away safely ready for next weekend when I will be investigating 'the brakes' fingers crossed this will go the same way as the rest so far, but I have a feeling it won't...
Back to the top»
In this update I get to grips with seeing if we can get the brakes working...
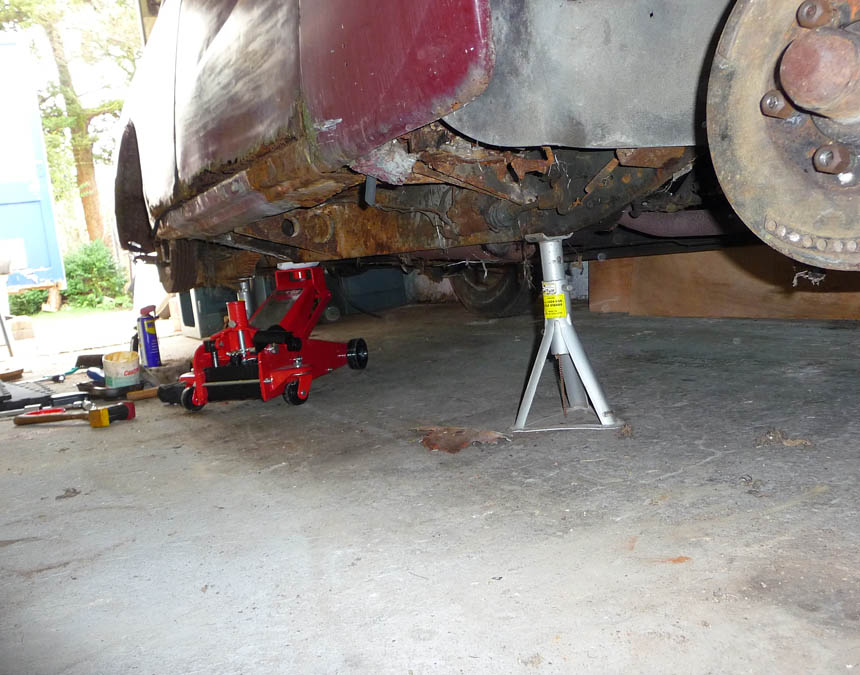
Another introduction to the garage equipment arrived ready for the next lot of tasks. After all the messing around with the baby trolley jack I though the time was right for a proper upgrade in the
form of my new 3t quick-lift jack, proper job.
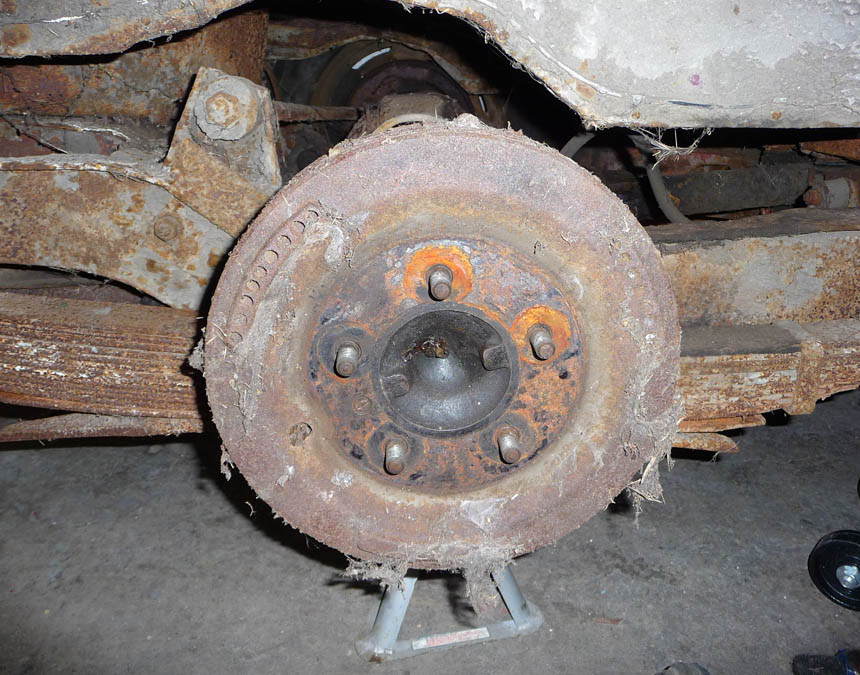
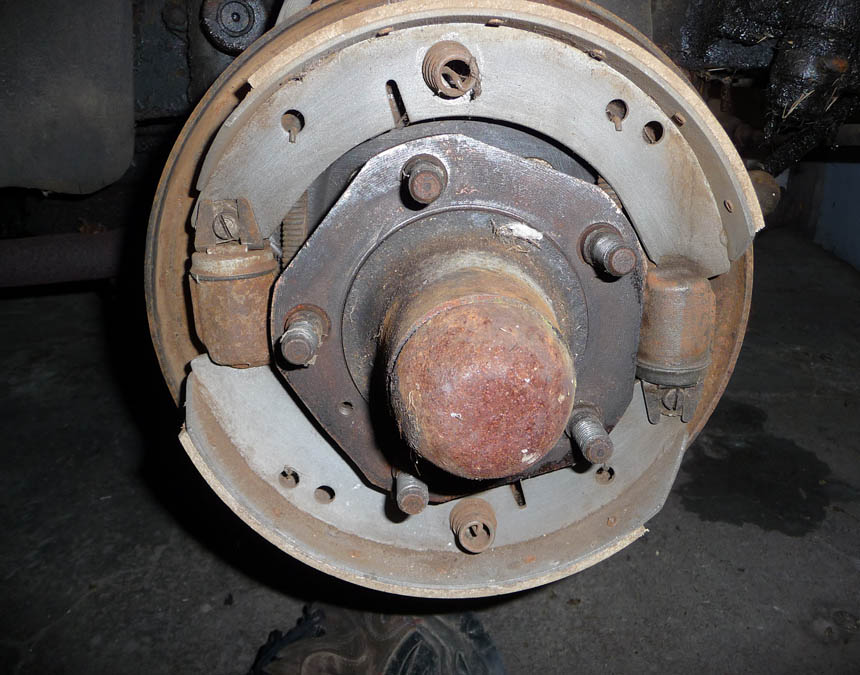
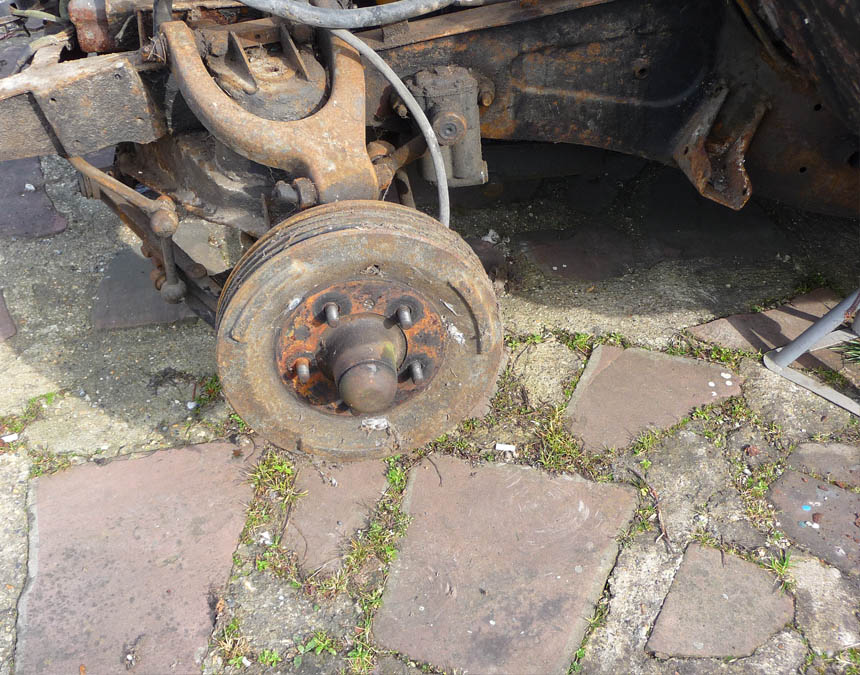
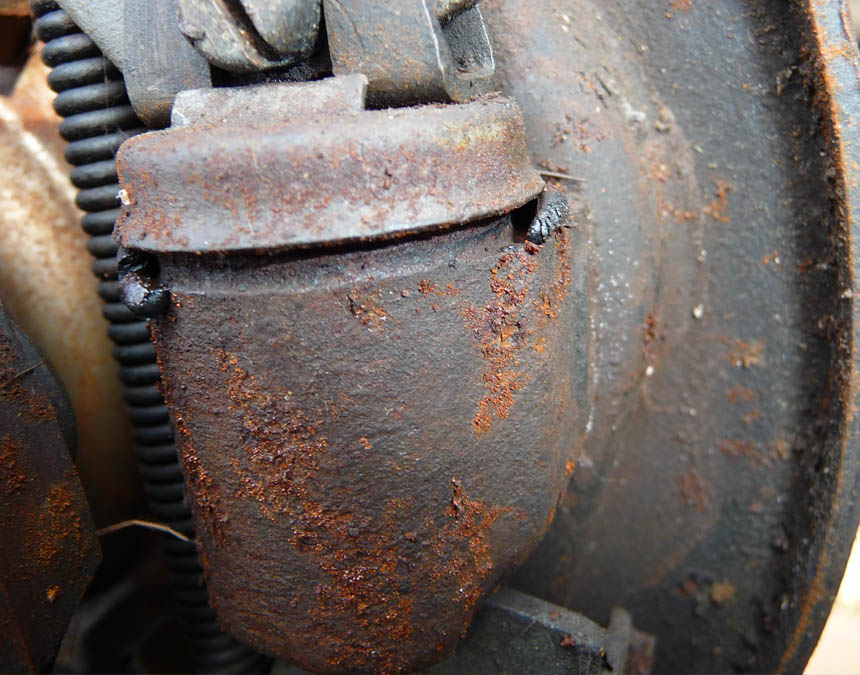
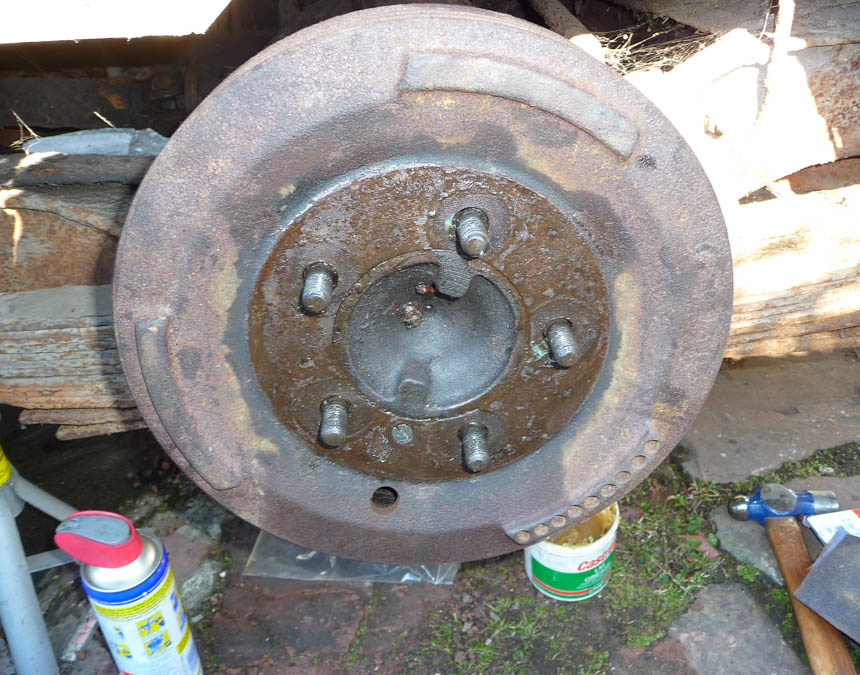
With the wheels off it was time to get to grips (literally) with the rather crusty and cobwebbed drums.
The front was even furrier
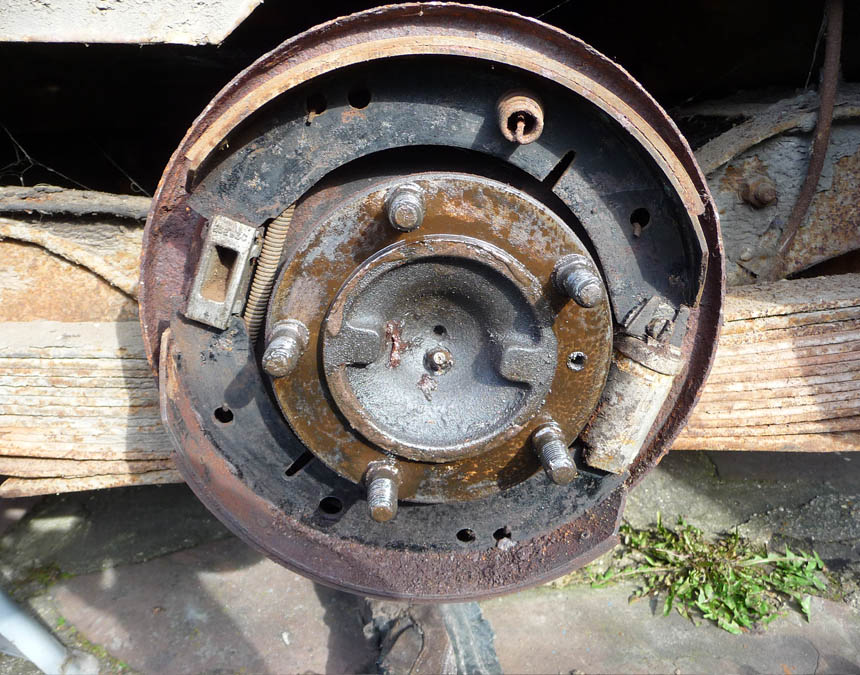
Despite this the internals were in fairly good nick
The front one was even better, and what looks distinctly like pretty new shoes.
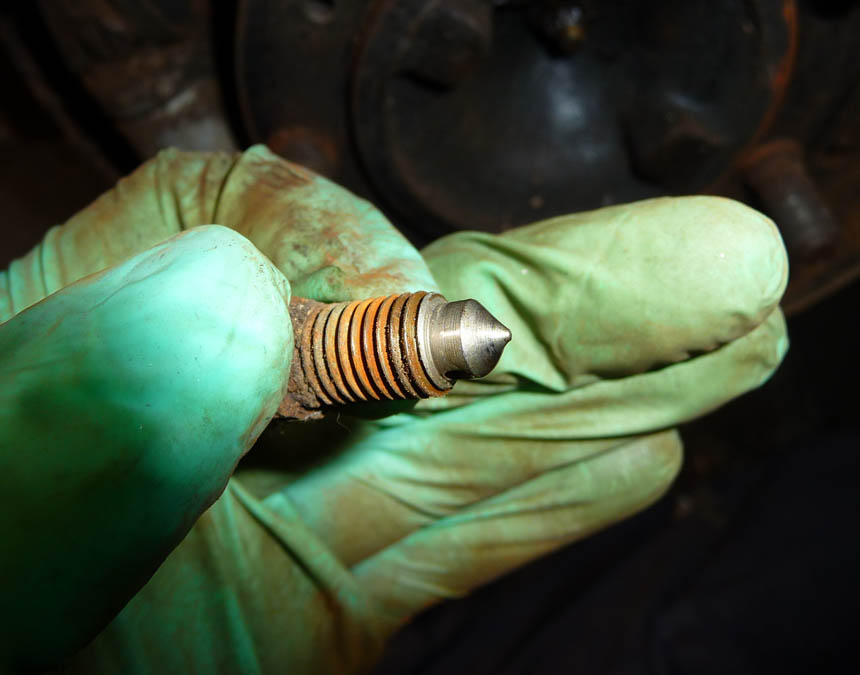
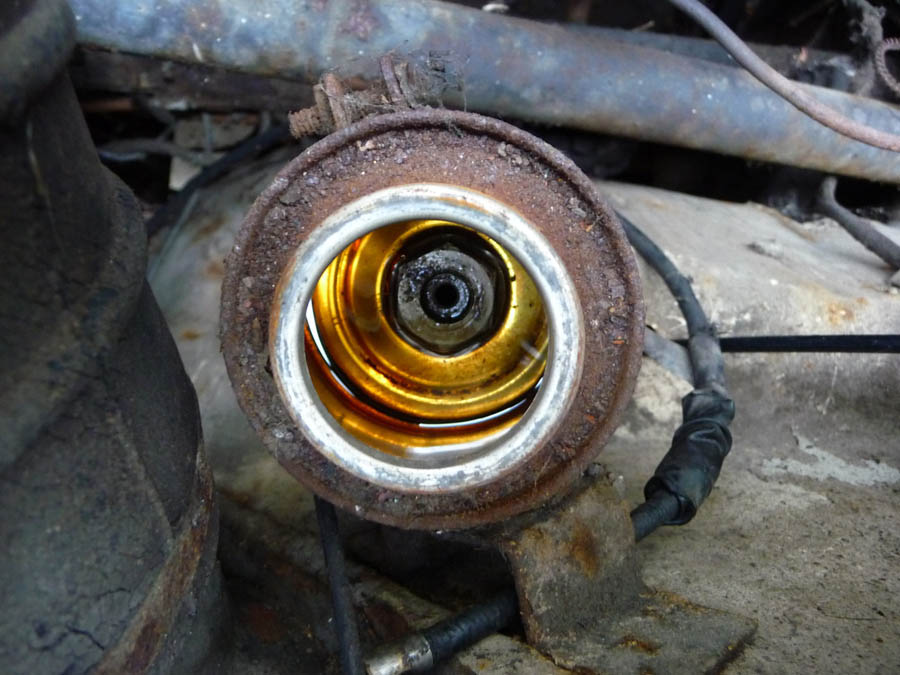
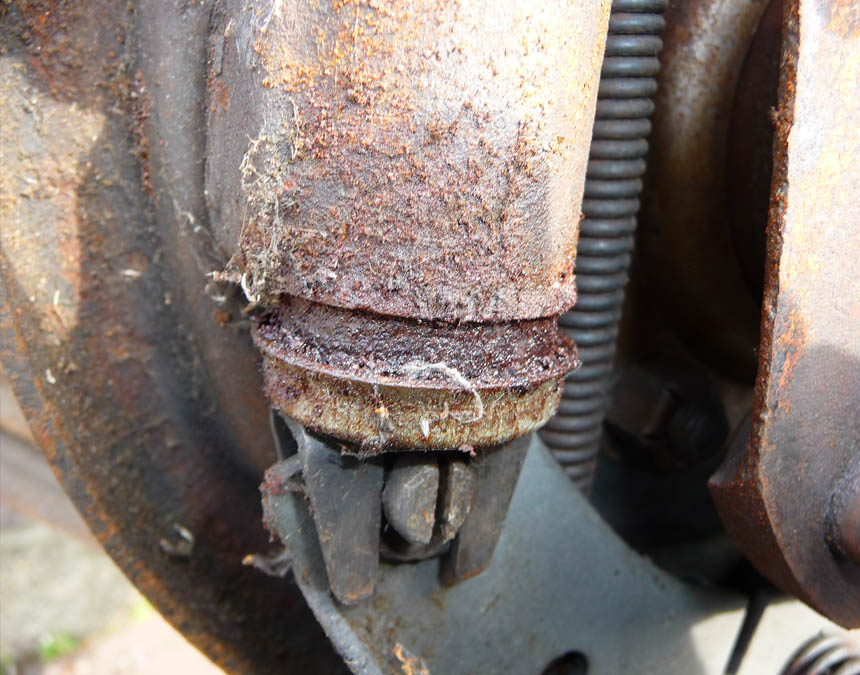
Another pleasant surprise was the fact we found the end of the bleed nipples were still wet proving there was a little fluid left in the system after 40 odd years.

The front bleed nipples also wet albeit a little less clear. I have to admit I was expecting a load of crystalline crust blocking the system, but yet again Tynny delivers.

The braking surface although a little rusty was no problem and with a little persuasion with some oxide paper soon came up OK.
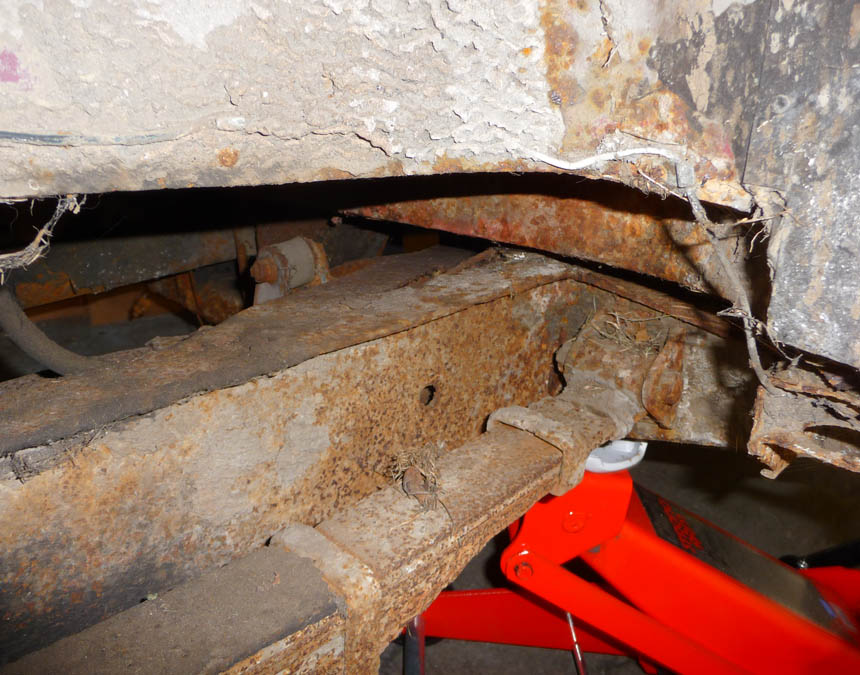
Whilst I was under the rear arch I had a look around at the condition of the chassis. I am pleased to report that although there is the expected surface rust, a good podge with a screwdriver and a BIG
HAMMER proved the chassis to be still good and solid.
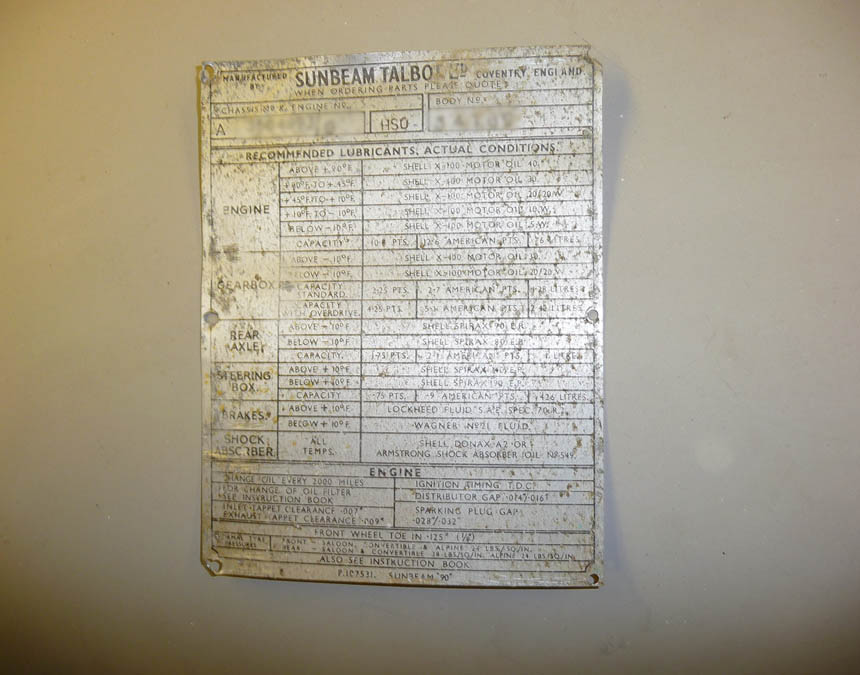
Whilst having a look around inside on a tea break, I was delighted to find the original VIN plate.
Back to the top»
Part two of the brakes, This time I have a look over the nearside as no rain means I can get her out on to the drive.
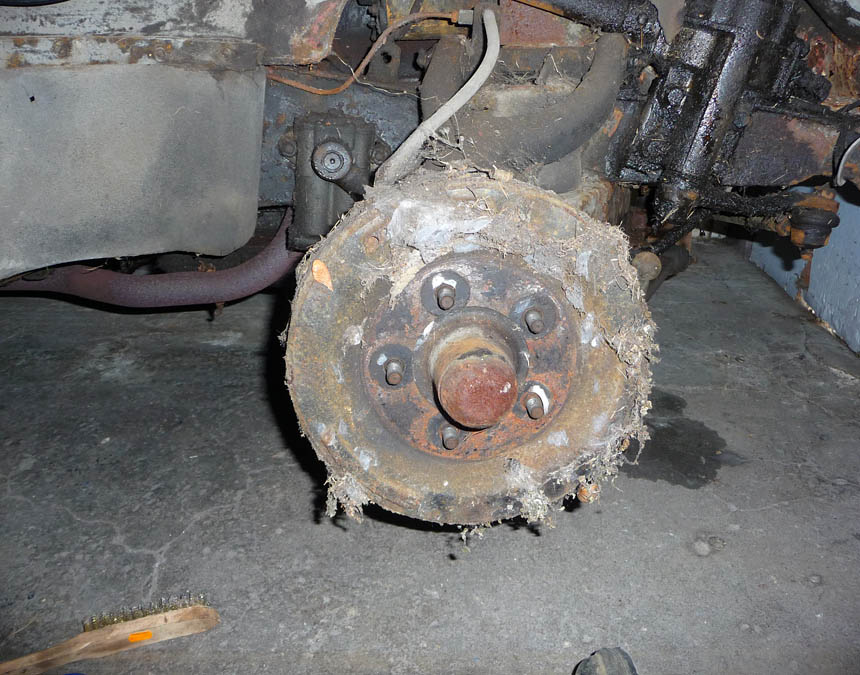
You may remember the grief that the nearside rear gave me earlier in this section. Well the grief was not over as I tried the release the drum.
Front drum was much easier with no wing.
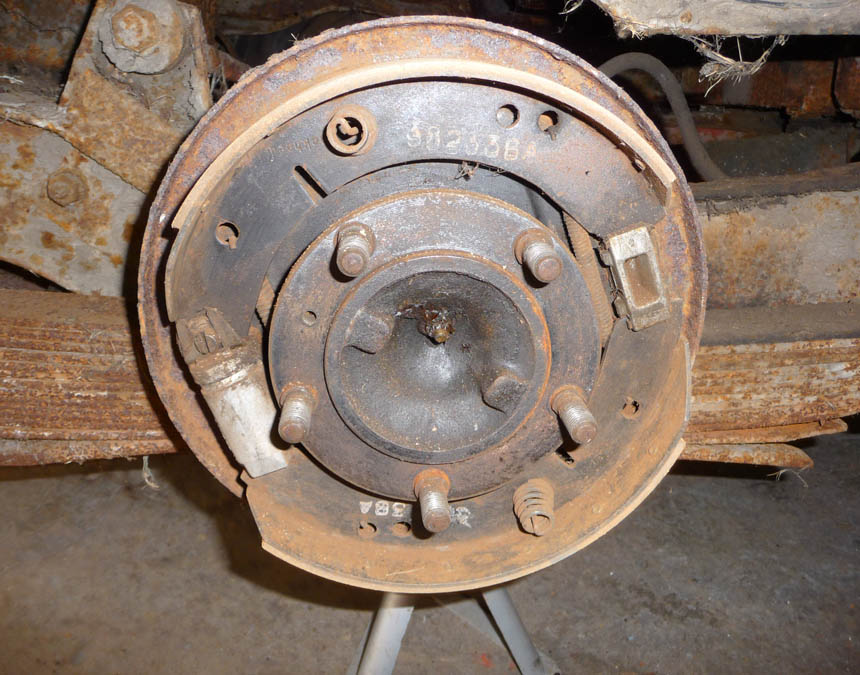
With much sweating and effort the rear drum finally succumbed to elbow power and vice-like grip, oh and a soft faced mallet. Having a look over what was underneath revealed the culprit, or rather
the non existence of the bottom bee hive spring causing the bottom shoe to cock over as soon as any effort was made pulling the drum off.
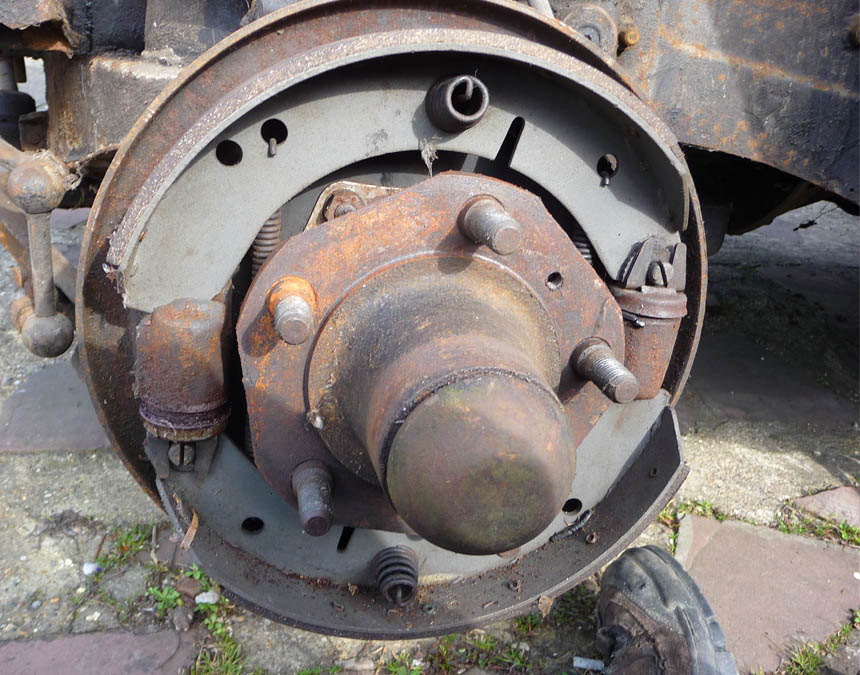
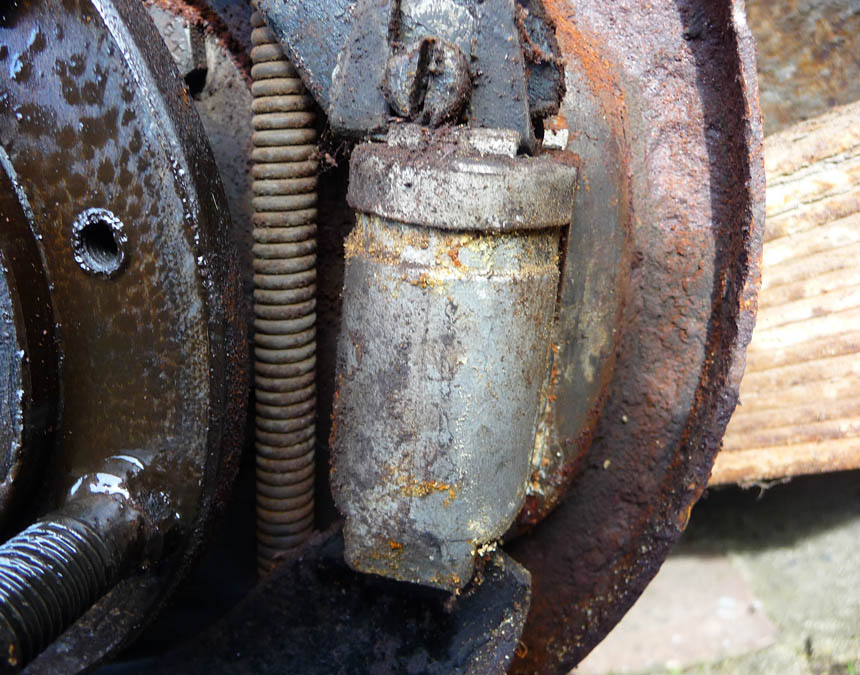
Once again the same as the offside front, this assembly was in good condition with some fresh looking shoes.
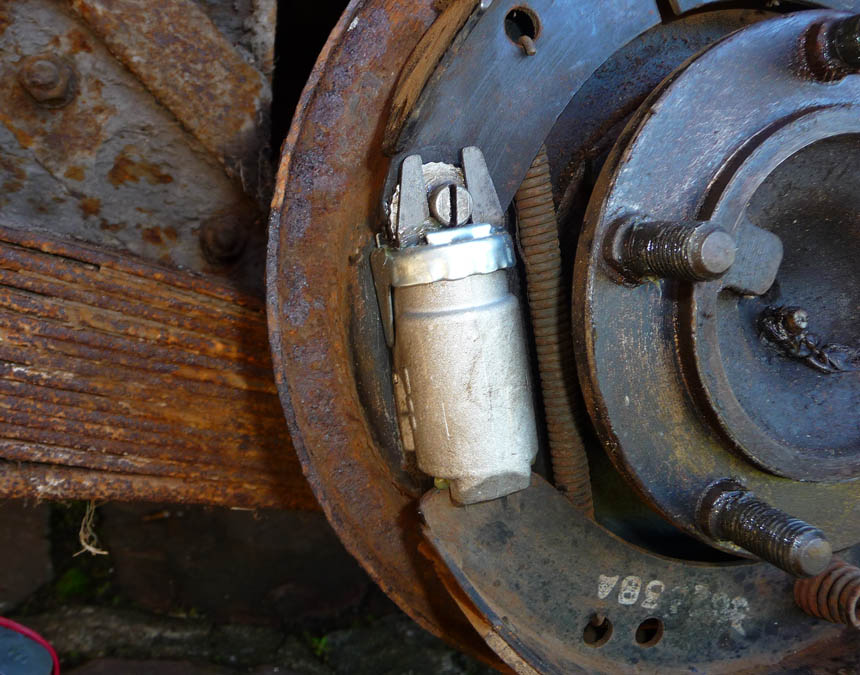
Despite the wheel cylinders not looking their best I decided to get some brake fluid into the system and check for leaks etc.
To my surprise we got a fair bit of pressure after bleeding all four corners. No blockages at all, mind you the stinking dark grey substance that came out of each bleed nipple was not particularly
pleasant
The only major problem was that the rear cylinders were fully crusted with dry brake fluid. No matter how hard the brake pedal was pushed they didnt shift. What was evident though was the amount of
pressure exerted didnt start any leaks, Yet

With the rear wheel cylinders removed you can see the extent of the crust. Not worth a refurbishment this time.
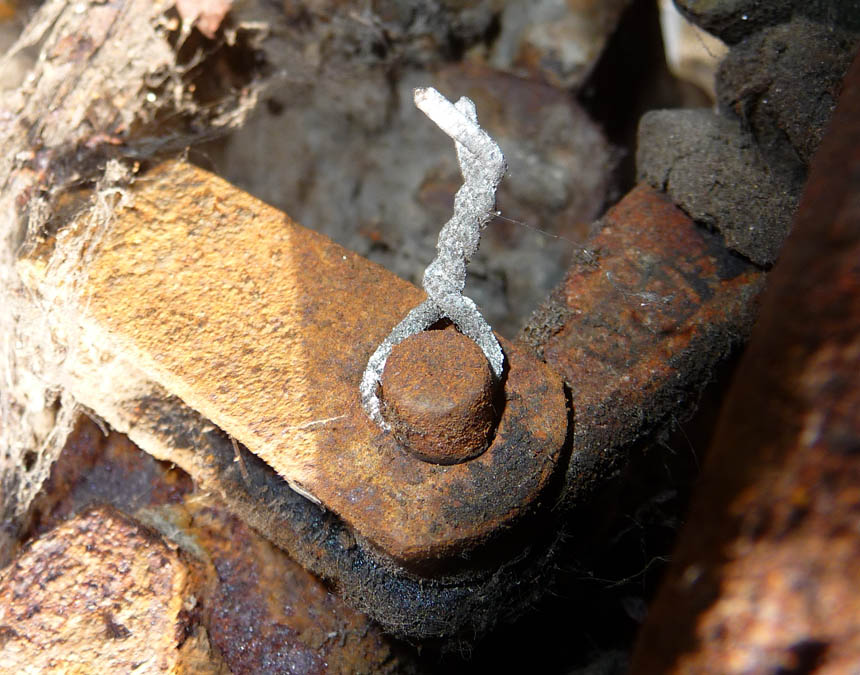
A private joke between myself and my dad, was that I noticed he had used twisted wire instead of proper split pins on the handbrake connecting rods. Mind you the fact that I found them after 40 odd
years means that they did in fact work
Alas we didnt get away leak free. With all the effort to try and make the rear cylinders budge the master cylinder finally let go. Not to worry though, Tynny put in a great effort once again this
weekend. N.B. the wetness is WD40 to help undo the bolts.
Back to the top»
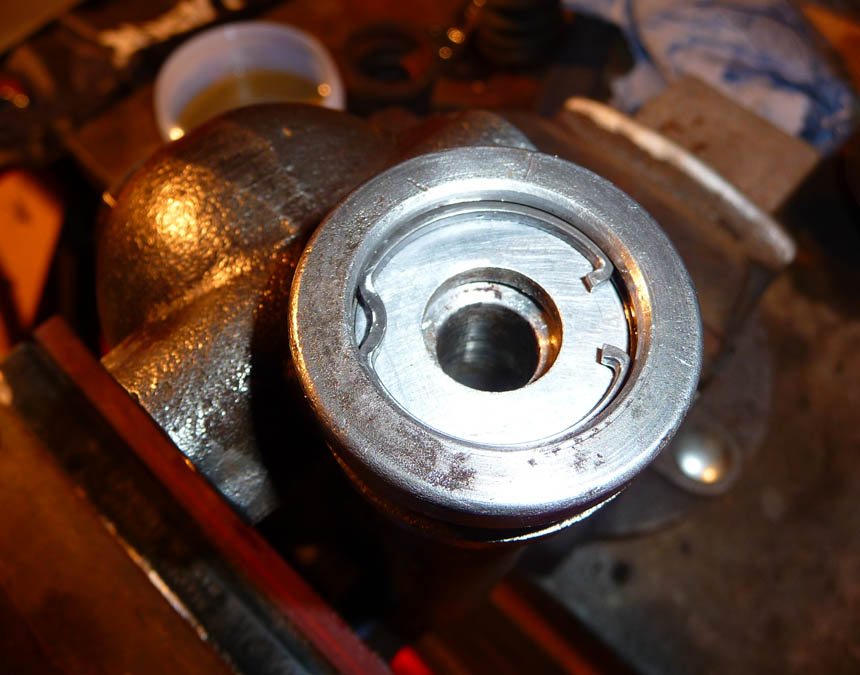
Part three of the brakes, a mid week play with the master cylinder ready for this weekend
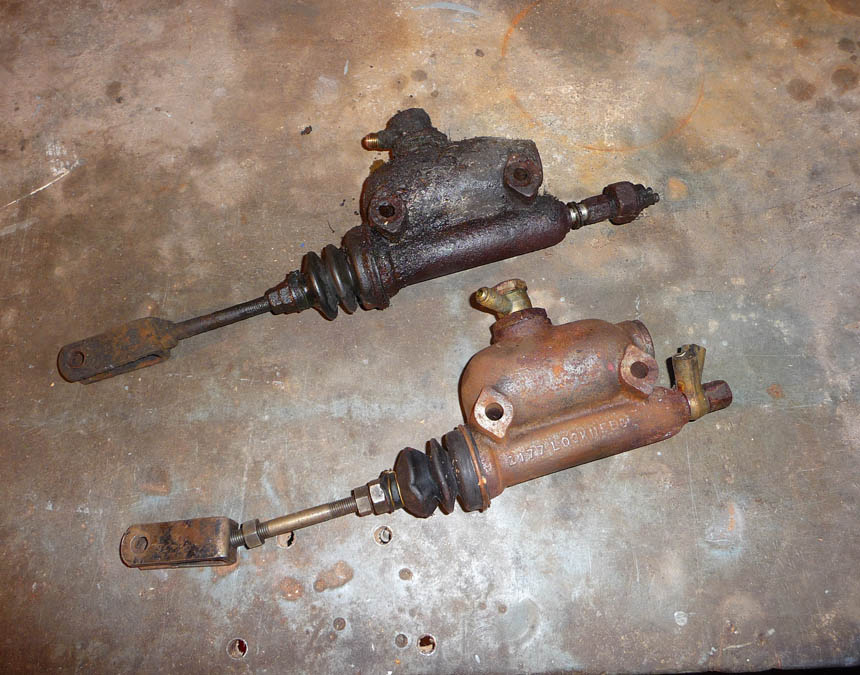
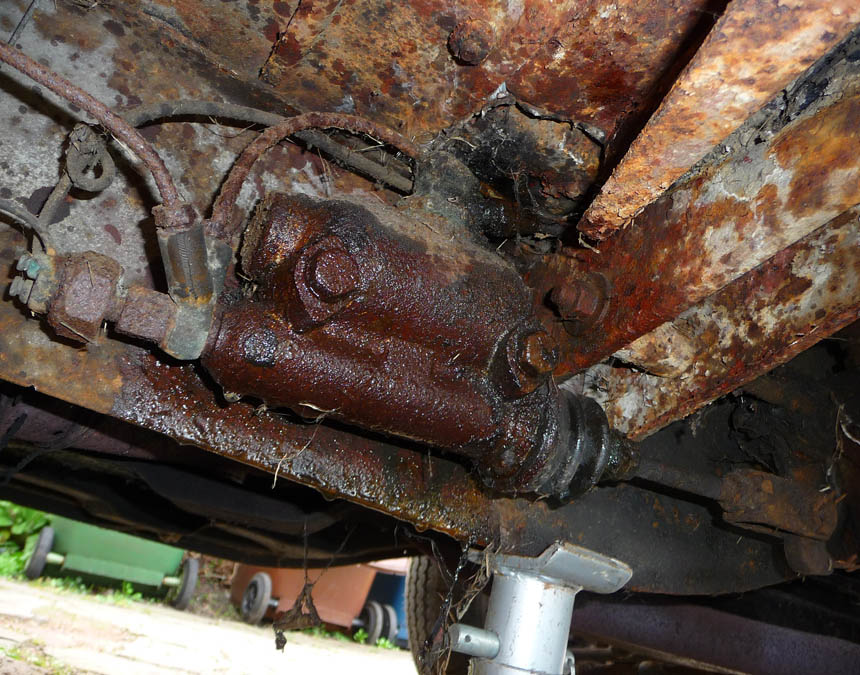
Back in the garage now to refurbish the master cylinder. A quick check of my local Sunbeam parts depot (My dads loft) procured another master cylinder in pretty fair condition, at least from the
outside
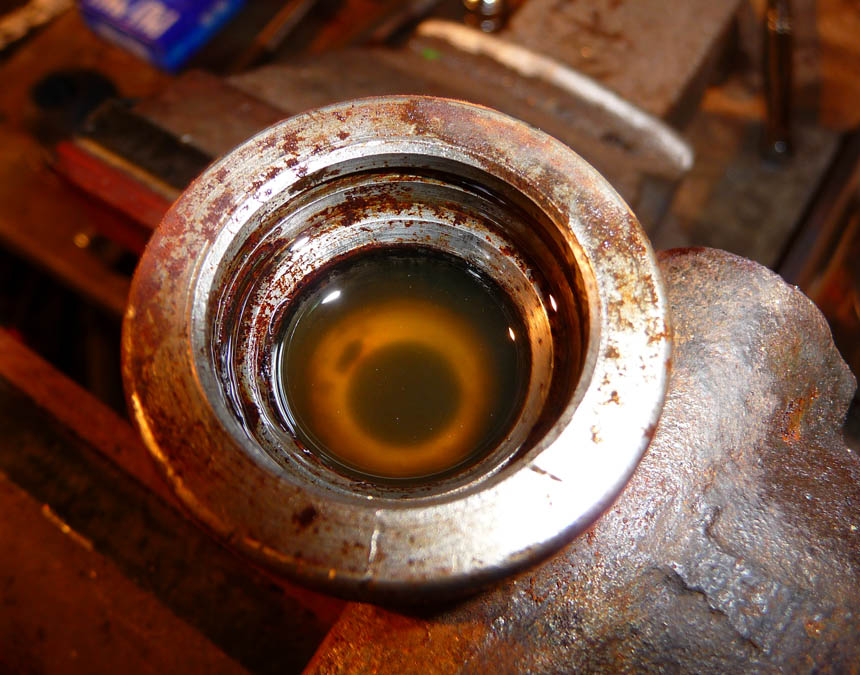
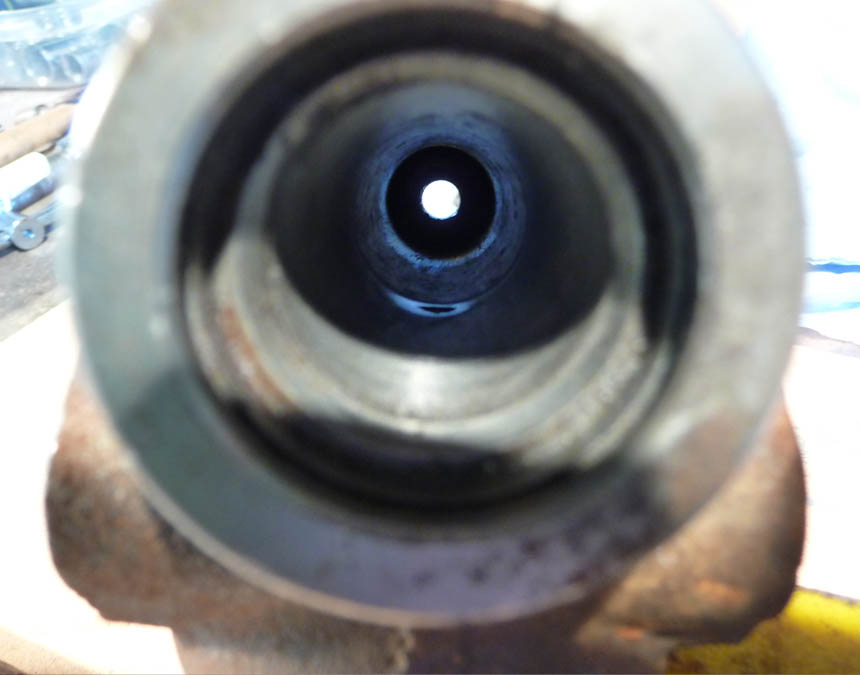
With the connecting rod and gaiter taken off it was time to release the piston assembly. This proved to be quite a job as not matter what I did it was stuck fast, even drowning it in WD40.
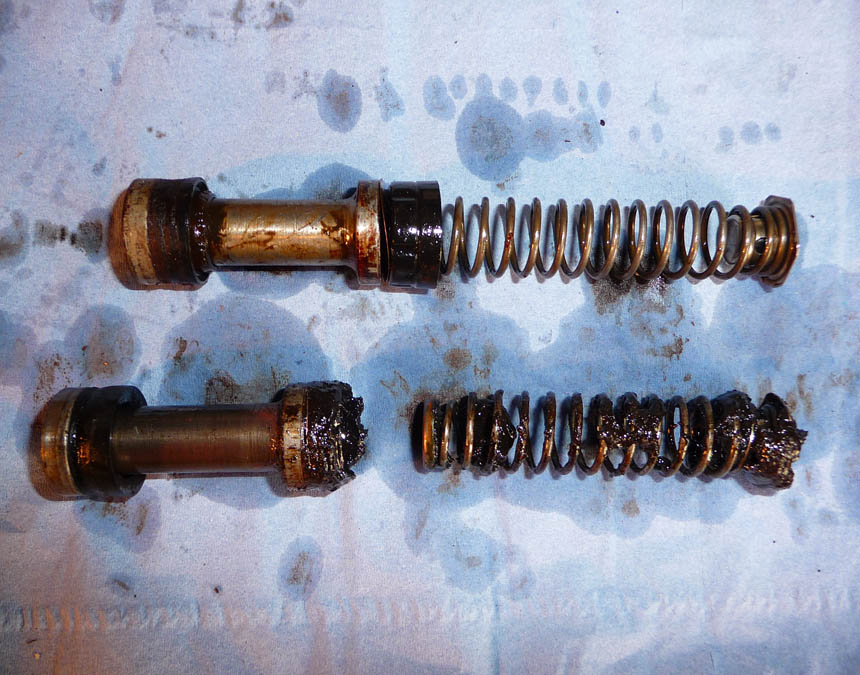
I had to resort to brute force in the end by sliding a drift up the outlet hole and tapping, (actually belting) the piston out which I really hated to do because of possible damage. Finally the piston
came lose, you can see the problem on the lower assembly. The rubber parts had welded themselves in.

With the piston out and the remnants of the seals removed I notice surface rust up the bore. Out came my trusty baby hone, a neat bit of kit.
All nice and clean ready for the re-assembly
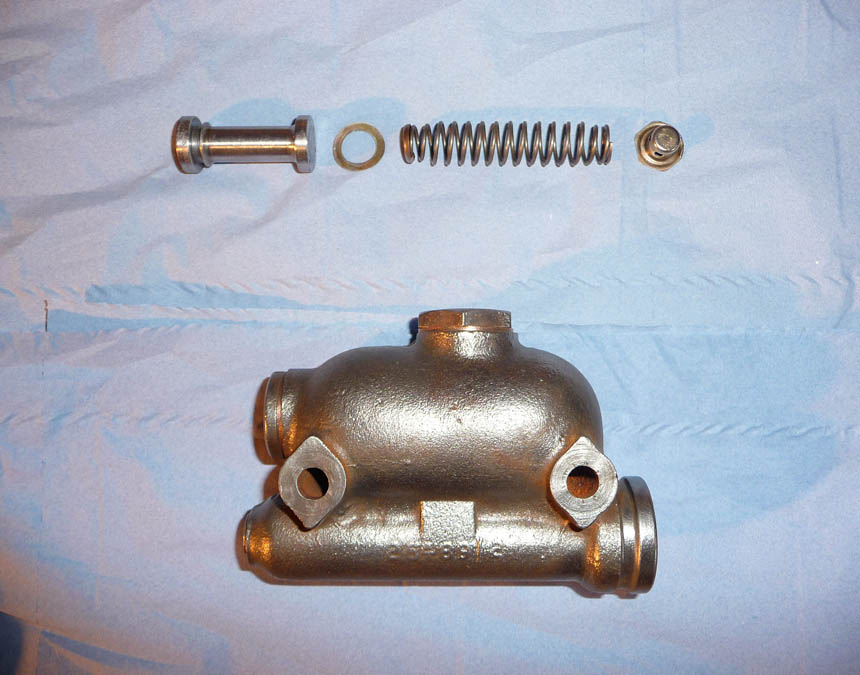
I gave the piston assembly and body a clean up too.
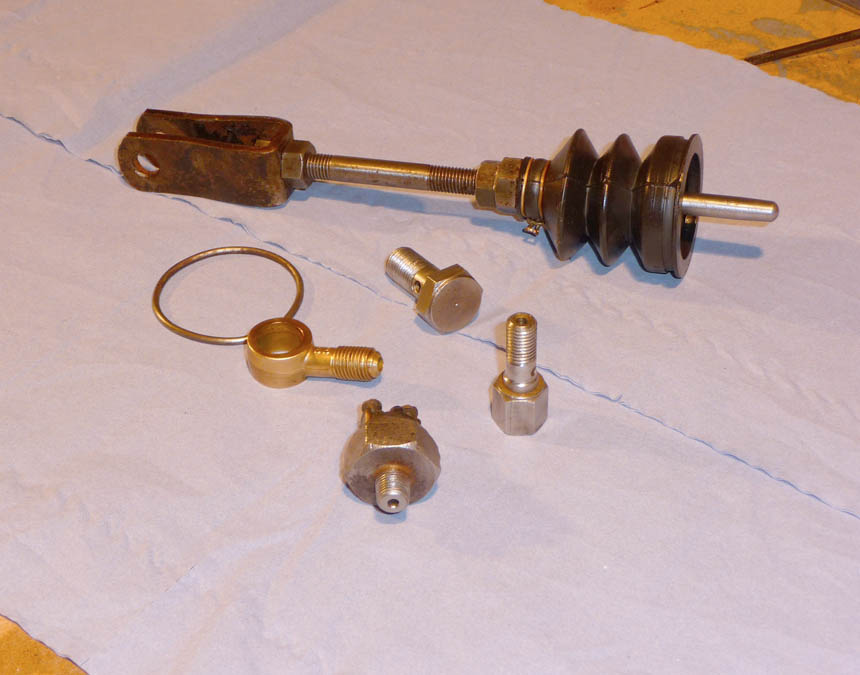
Connecting rod and banjo fittings all cleaned up ready.
Piston assembly fitted and lubricated

There we have it on refurbished master cylinder ready for the weekend!
Back to the top»
Part four of the brakes, and with the refurbished master cylinder in hand the system gets reconnected
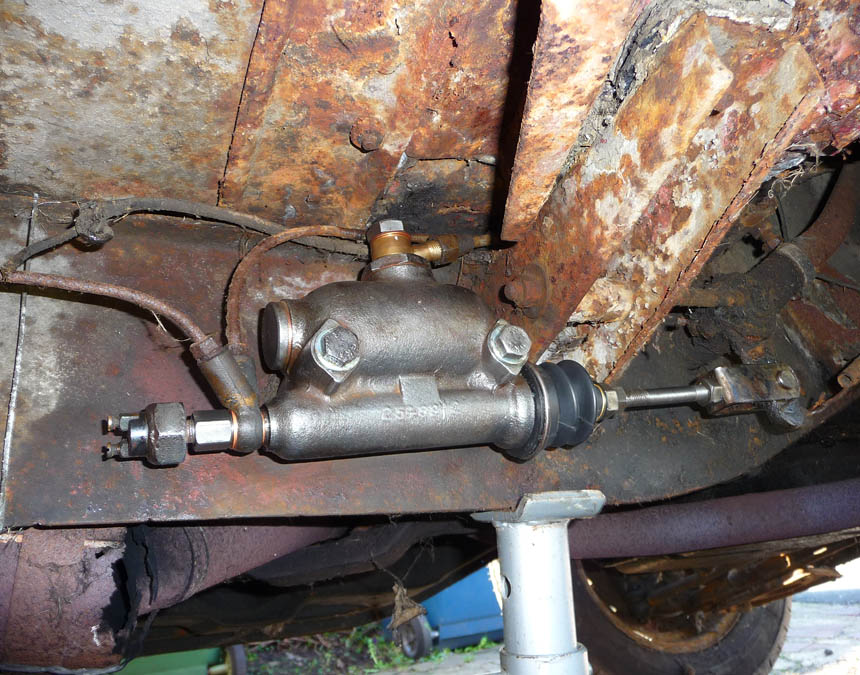
First job this weekend was to refit and connect up the refurbished master cylinder.

A closer view of the master cylinder in situ, pretty pleased with how it came out
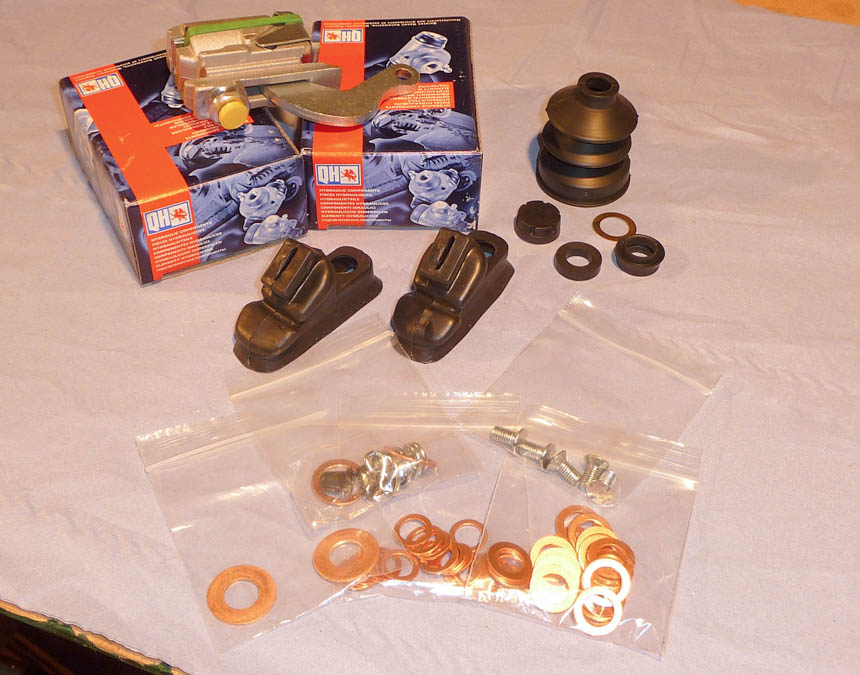
Next job was to fit the new wheel cylinders also had chance to give the backing plates and snail cams a little sprucing and greasing.

With the whole system bled through I could put all the bits back together.
Drums and wheels back on and with Tynny back on all fours it was time to give the brakes a wee test. Well we have some half decent brakes to make things safer come the big move.
Back to the top»
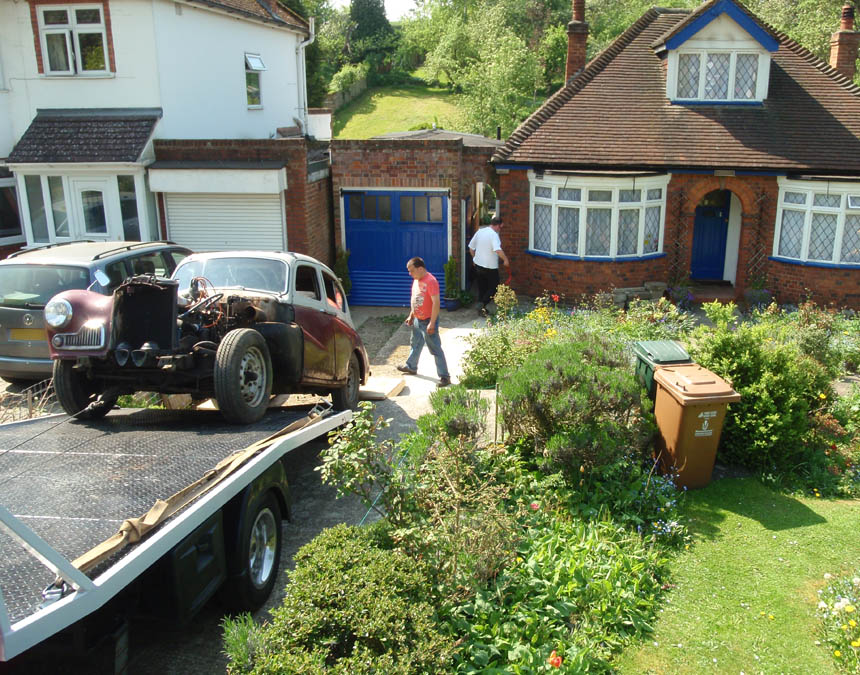
The BIG DAY has finally arrived to move Tynny to her new home. With a bright sunny morning we set to work.
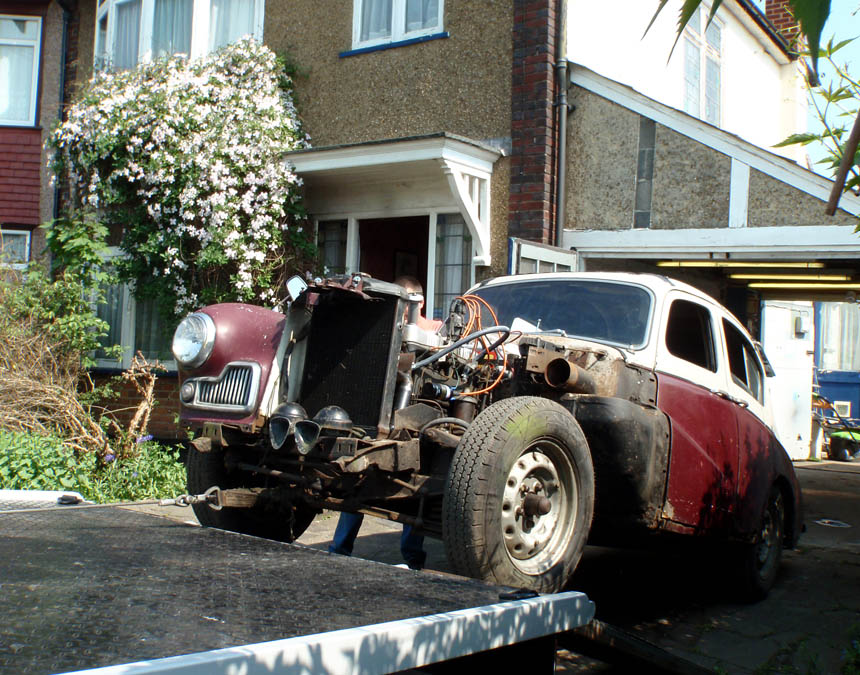
We got there nice and early to prepare for Charlie for CWF Recovery to arrive. Got here up and running, opened up the garage doors and waited. Whilst we waited I thought I would just double-check the
brakes. First couple of pushes all fine, the third was greeted with a hissing, followed quickly by a splattering noise. The main metal brake pipe on the offside rear had called time! Well at least we gave the
brakes a good go and I know Charlie had a winch
Ho Hum
Charlie duly arrived and she was winched with great care on the back off the best kept recovery truck ever!

An arty shot of Tynny on her movable throne. In the background a true stalwart of team Tynny namely Mum!

As you can see The CWF Truck is very nicely kept and the professional and more importantly careful service Charlie gives is second to none!
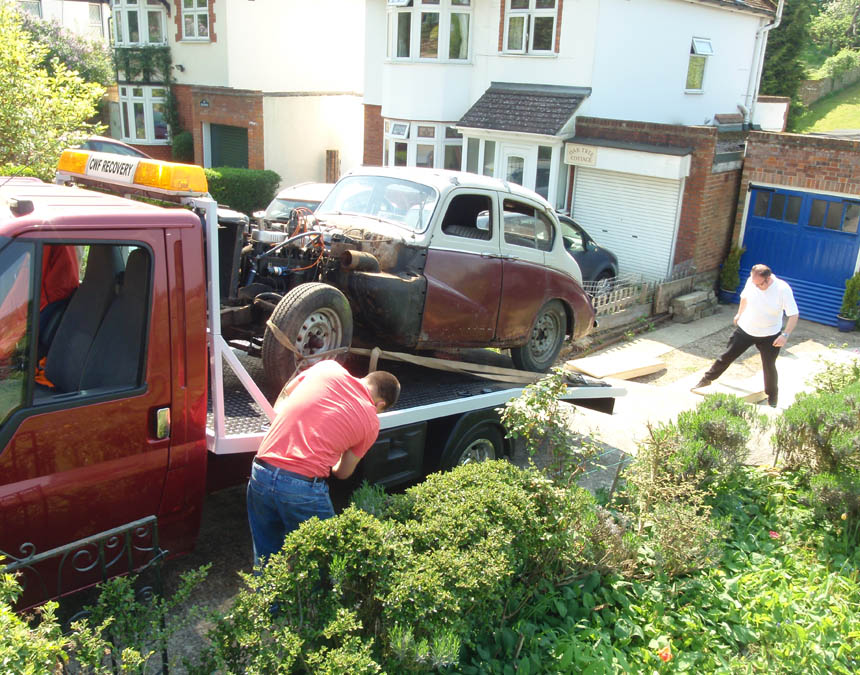
The reason I wanted brakes was that the drive here is pretty narrow and just in case the truck wouldnt fit I could at least back her in and down. Thankfully the truck did fit albeit tightly
Im in
the background lining up the home made ramps to get her down to the lower part of the drive.
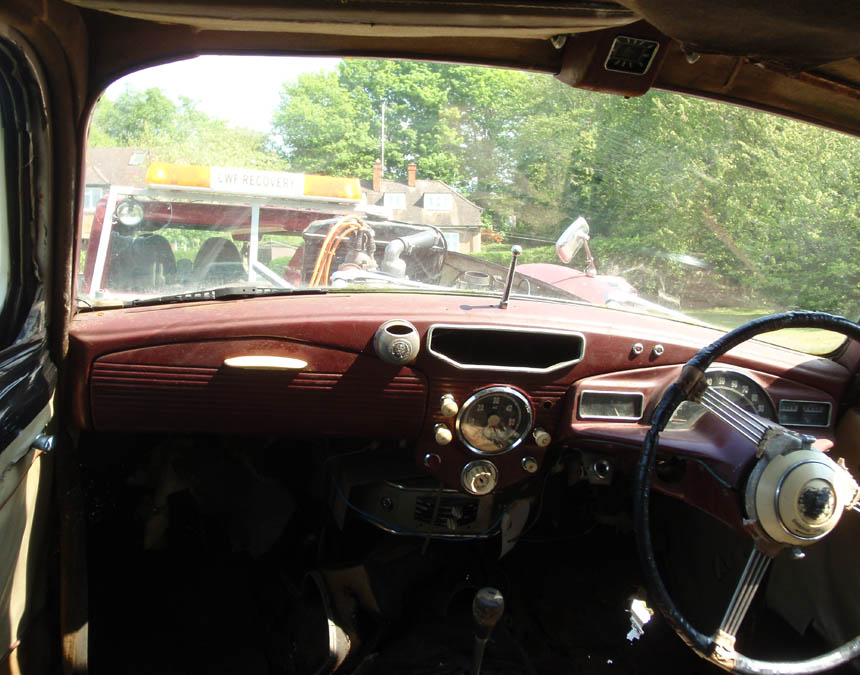
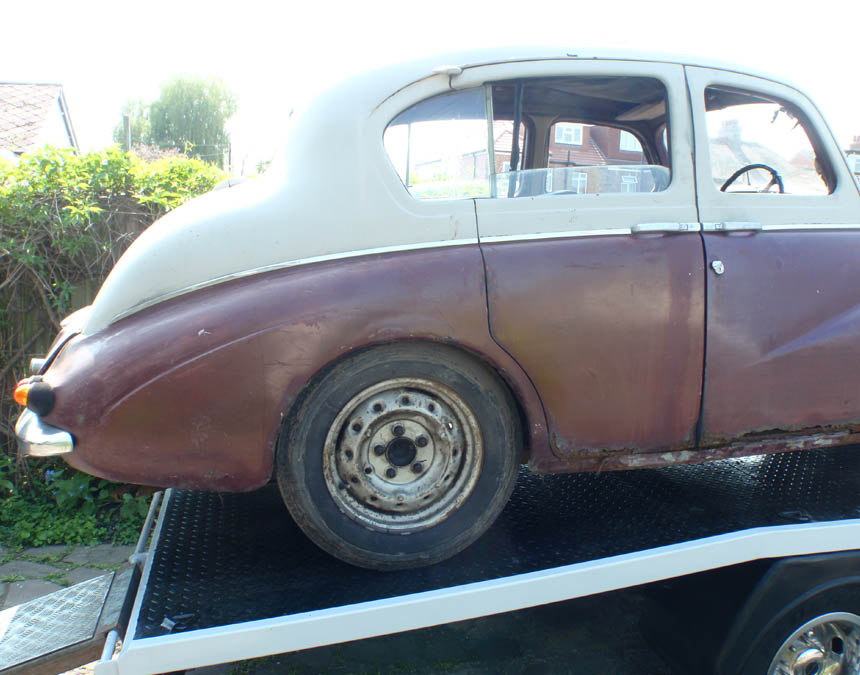
Another little arty shot whist she was still on the back of the truck. The interior looks quite good here in the shadow
With a careful bit of winching Tynny is lowered into her new position. I was a little concerned as she was going over my ramps but they did the job perfectly.

Finally on terefurma again.
And there we are, now the hard work begins but first I have to deal with getting the garage behind sorted. Cant restore her without a garage to work in.
|
|
Just for bit of fun I asked my good friend James (also a classic car nut) to take these pictures and do a bit of filming. Well here is the edited film giving you an idea of the days
activities. Now on to the next chapter. THE WORKSHOP
See Tynny's You Tube channel for more.
Back to the top»